You can create Redis/Elasticache even though Amazon Lightsail doesn't offer it. You can create an Elasticache for Redis cluster in AWS and connect using VPC Peering.
Prerequisites
- An Amazon Lightsail instance. To create a new instance follow Deploy Laravel Application to Amazon Lightsail or Deploy WordPress App to Amazon Lightsail
- Be a little familiar with AWS Console.
Create Elasticache for Redis
Go to Elasticache for Redis console. Change the region that you want to launch it. I selected us-east-1 as my Lightsail Instance(s) are there.
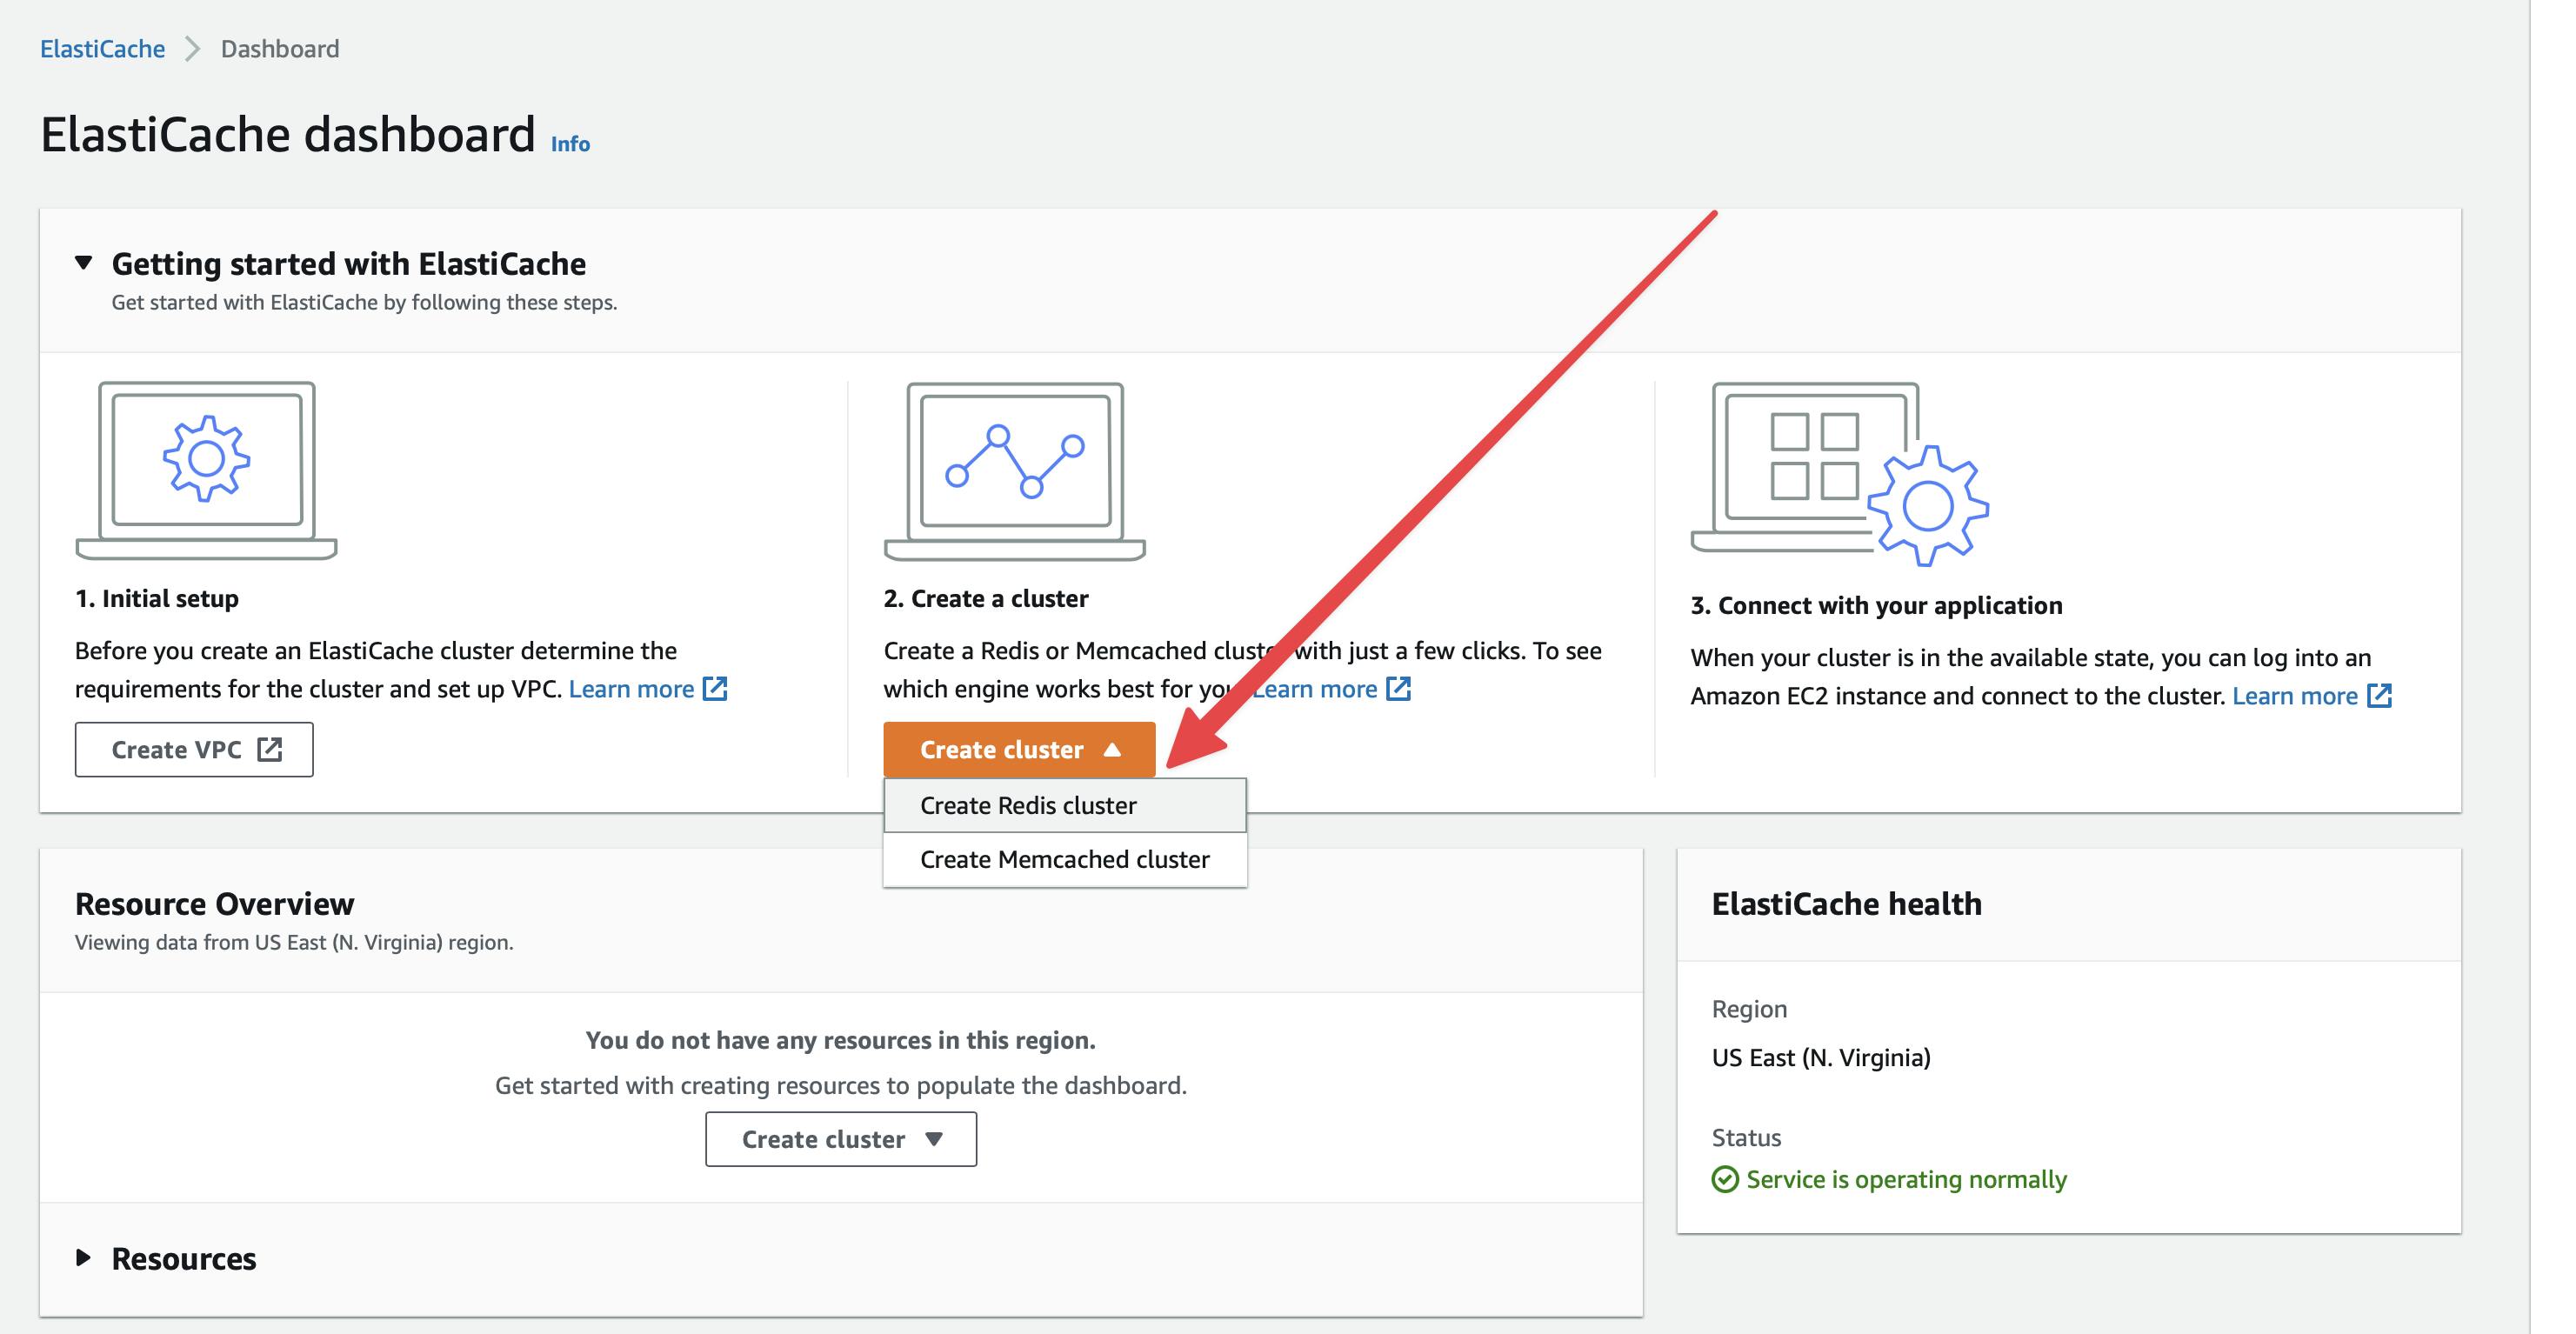
Click the Create Redis cluster button from the center of the page (or wherever you see it)
You will land in this screen 👇

- A. Choose Configure and create a new cluster
- B. Choose cluster mode Disabled
- C. Give it a name
- D. Uncheck Multi-AZ Enable
- E. Uncheck Auto-failover Enable
- F. Select a free-tier node type. Currently it's "cache.t3.micro" and "cache.t2.micro".
- G. Do not need any replica for this demo. Make it "0".
- H. Give subnet groups a name
- I. Select your VPC
- J. And then clieck the Next button from the bottom.
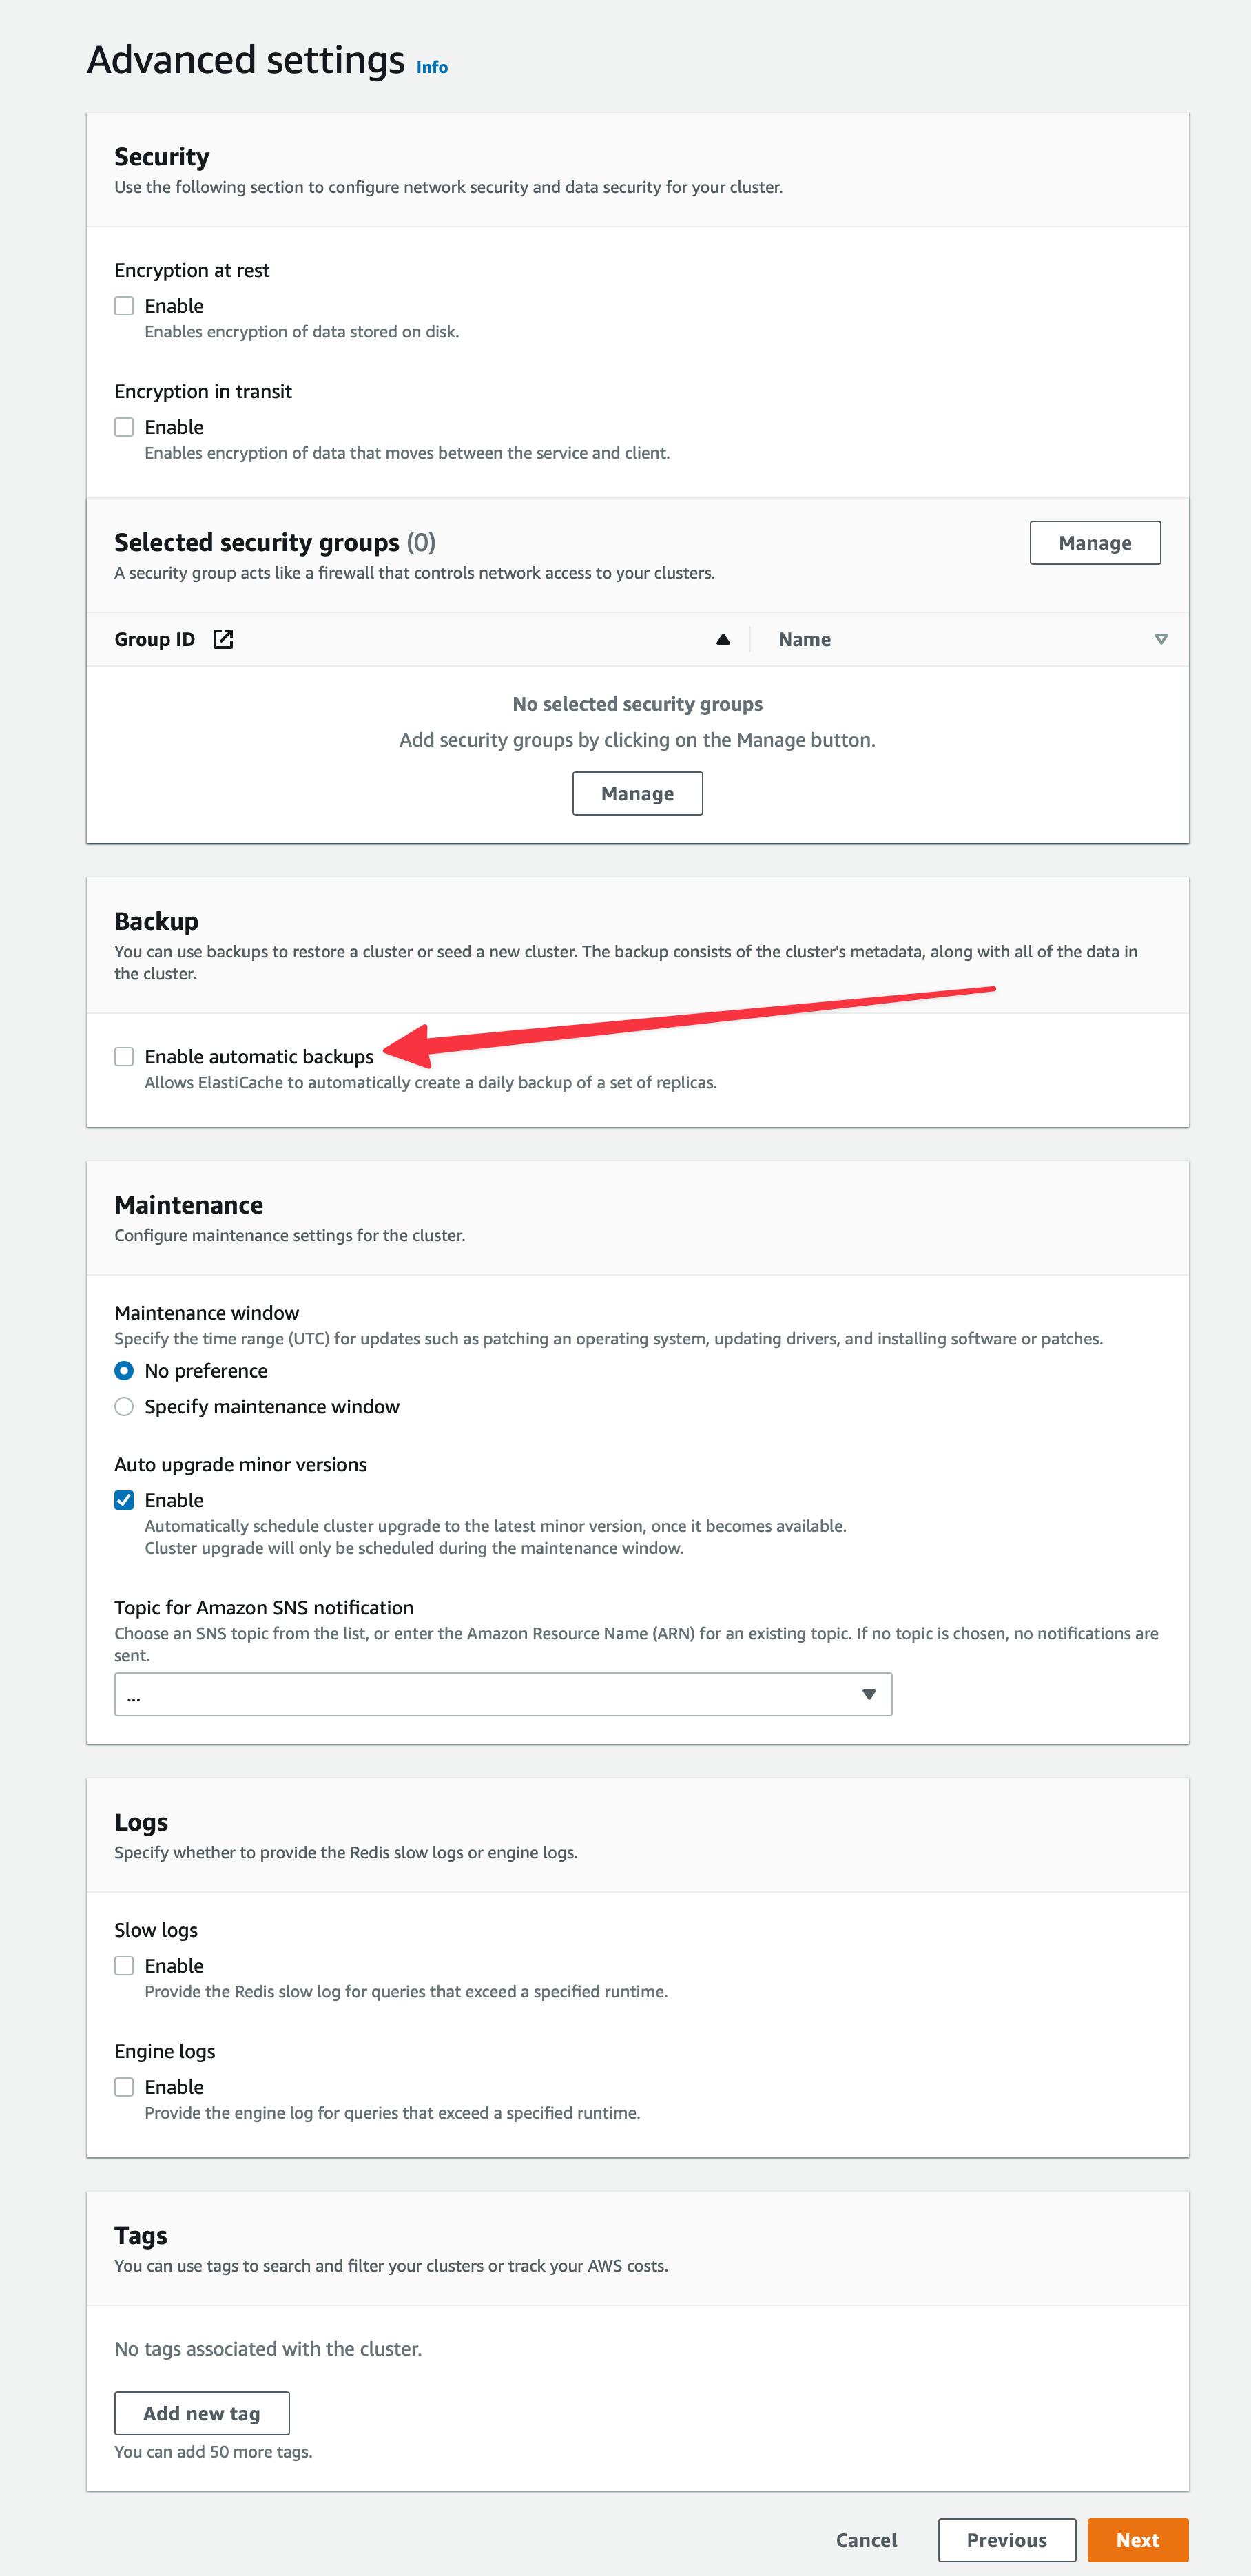
You will be on the second page. Just uncheck Enable automatic backup and click the Next button from the bottom of the page.
Review everything on the 3rd and final page. And then click the Create button from the bottom of the page.
It will take a few minutes to get created. Wait for status changes to Available.

now, click on the Cluster name. And you will be on the details page.
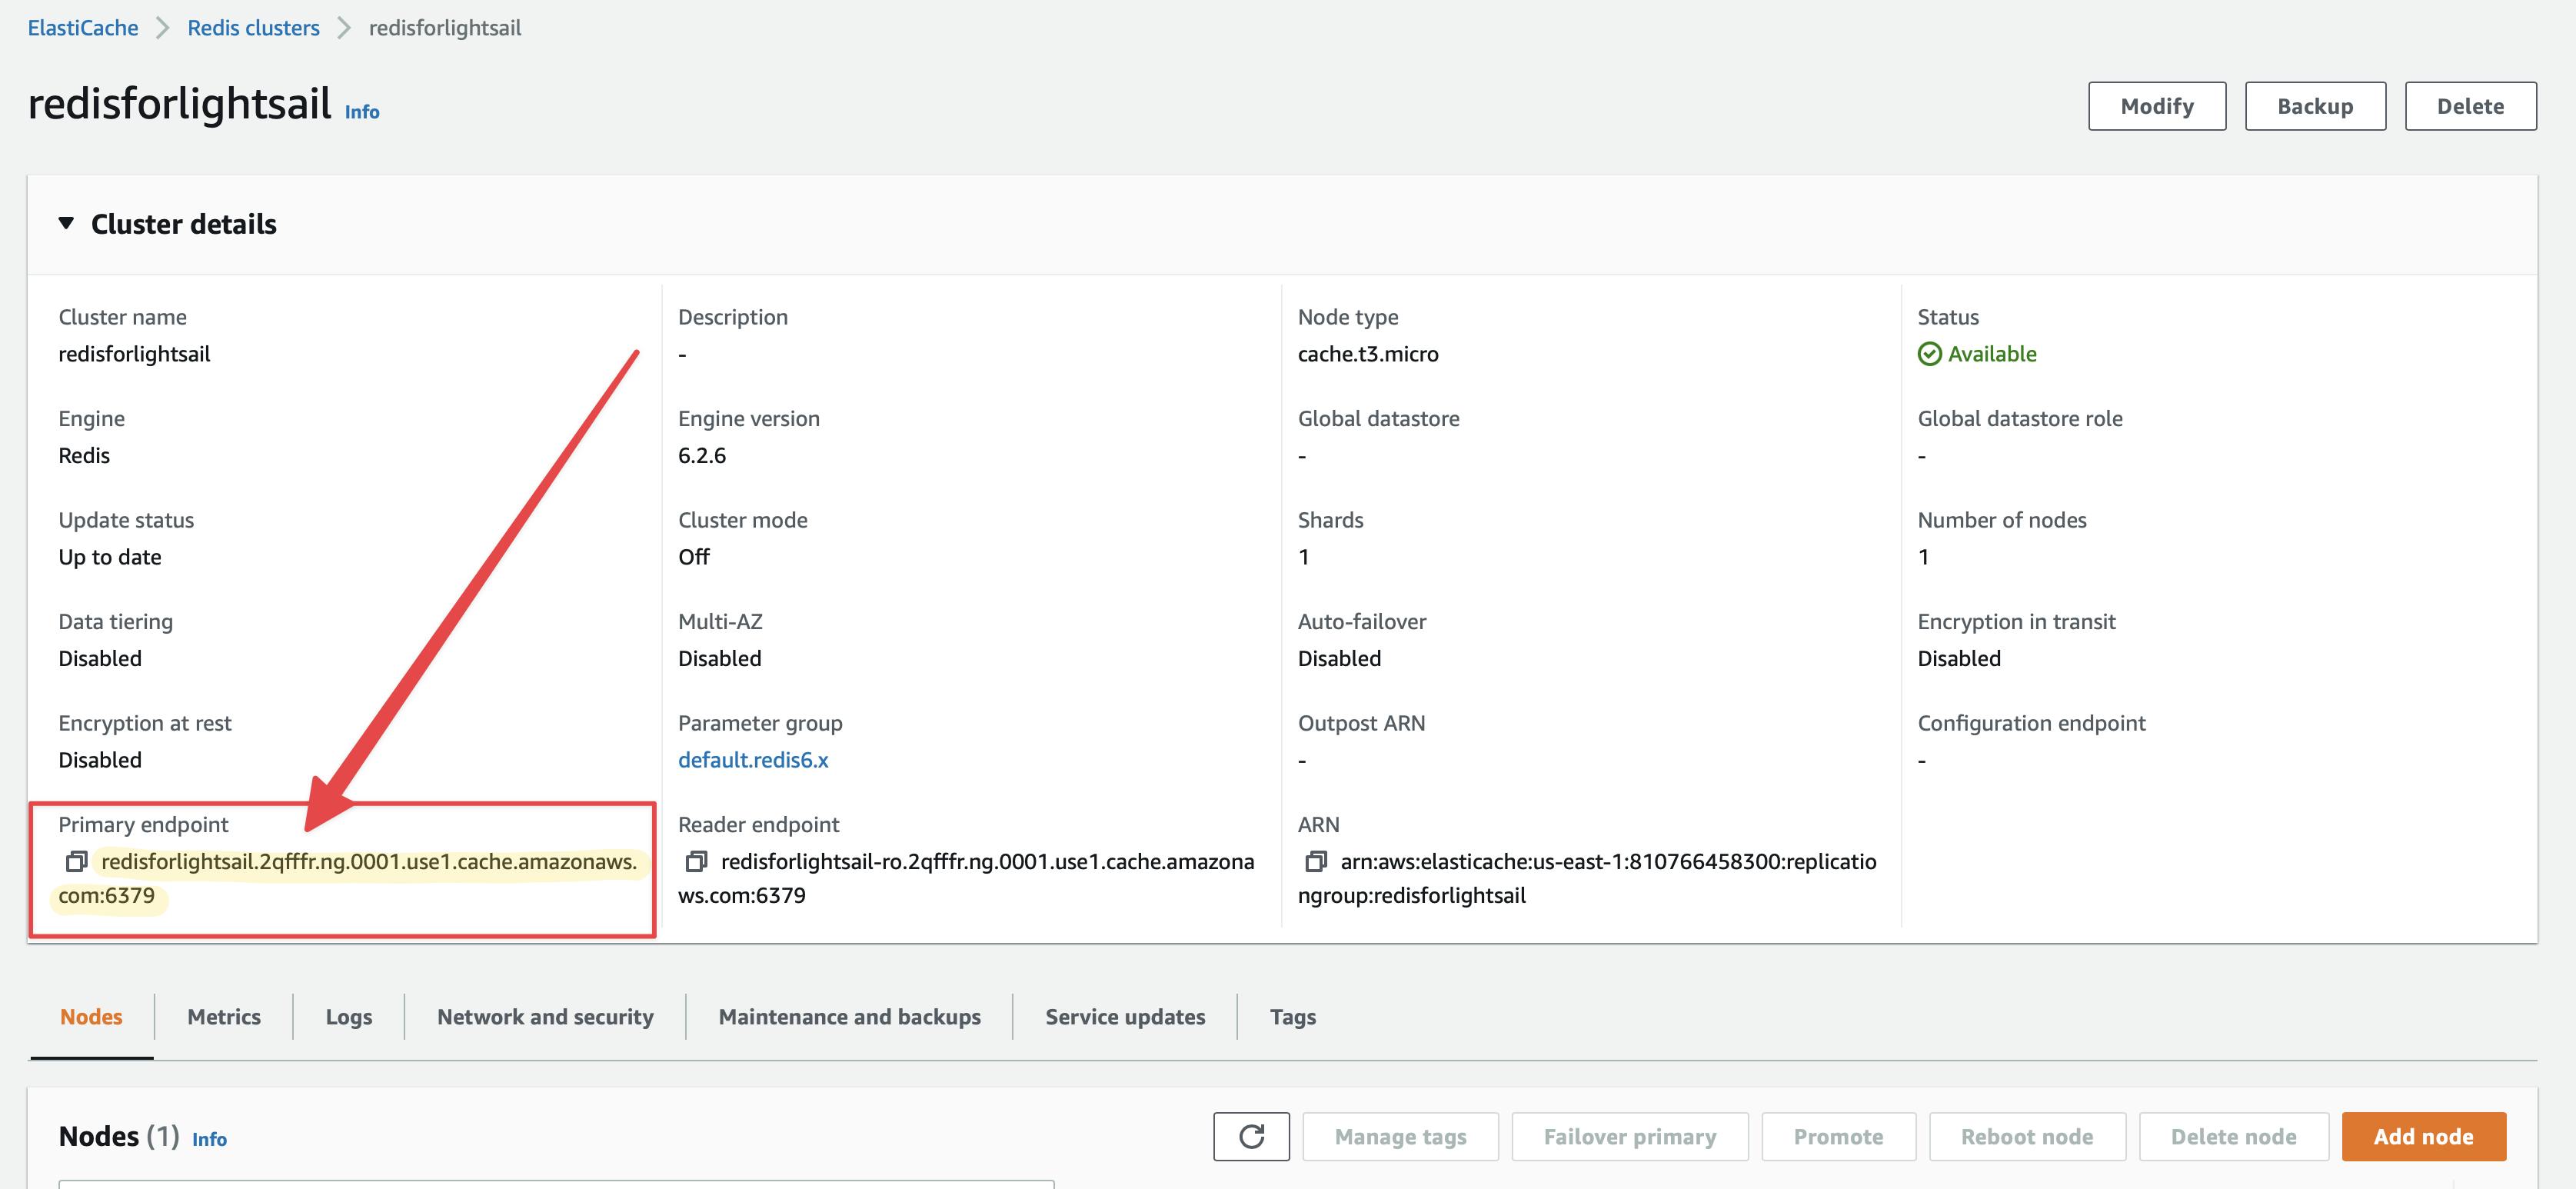 Copy the Primary endpoint in your clipboard or somewhere safe.
Configure Security Group for Redis cluster
Go to the Security groups of VPS Console. Make sure you are in the same region as the Redis cluster. And then click the Create security group from the top-right corner.

You are in create Security Group page
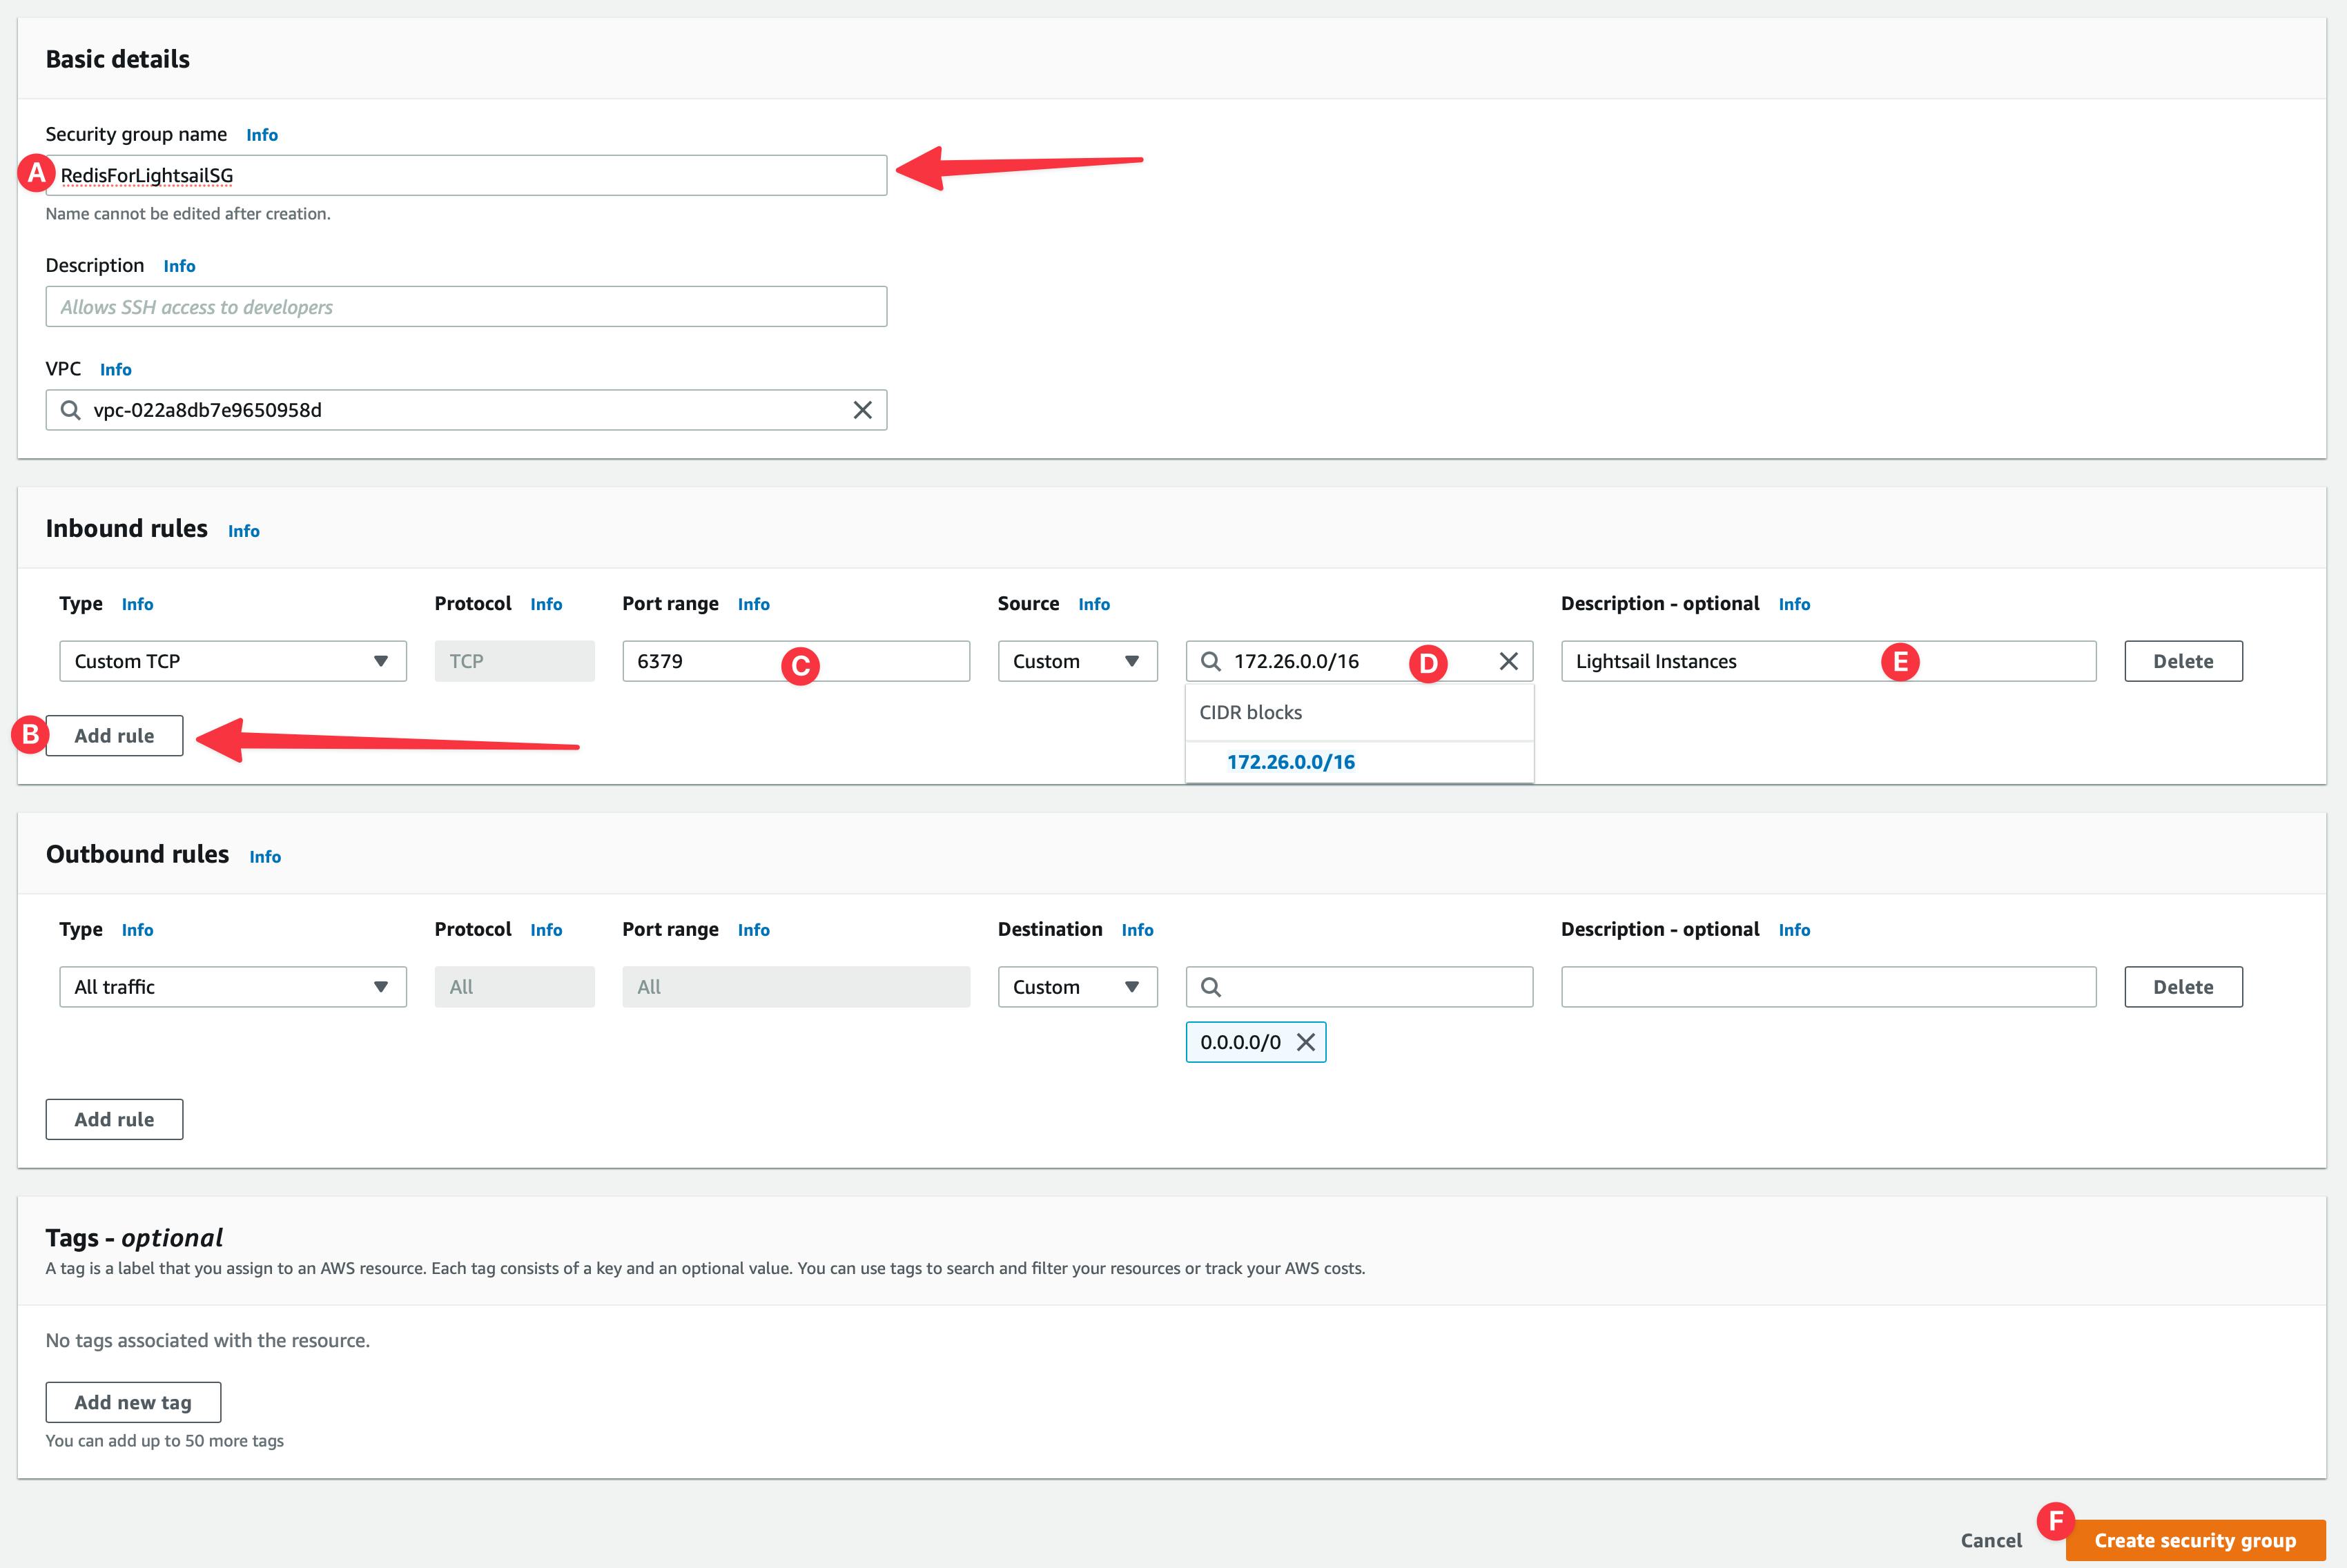
- A. Give it a name
- B. Click on the Add rule button of the Inbound rules section.
- C. Select 6379 as Custom TCP Port
- D. Add your Amazon Lightsail VPC IP range. To generate it, check your instance's Private IP address. Mine is 172.26.3.157. Replace the last two sections with 0 and add /16. So, mine became 172.26.0.0/16.
- E. Optionally, you can add a description
- F. Then hit the Create security group button from the bottom of the page.
Now go to the Network and security tab of your Redis cluster and click the Modify button from the Security groups section.
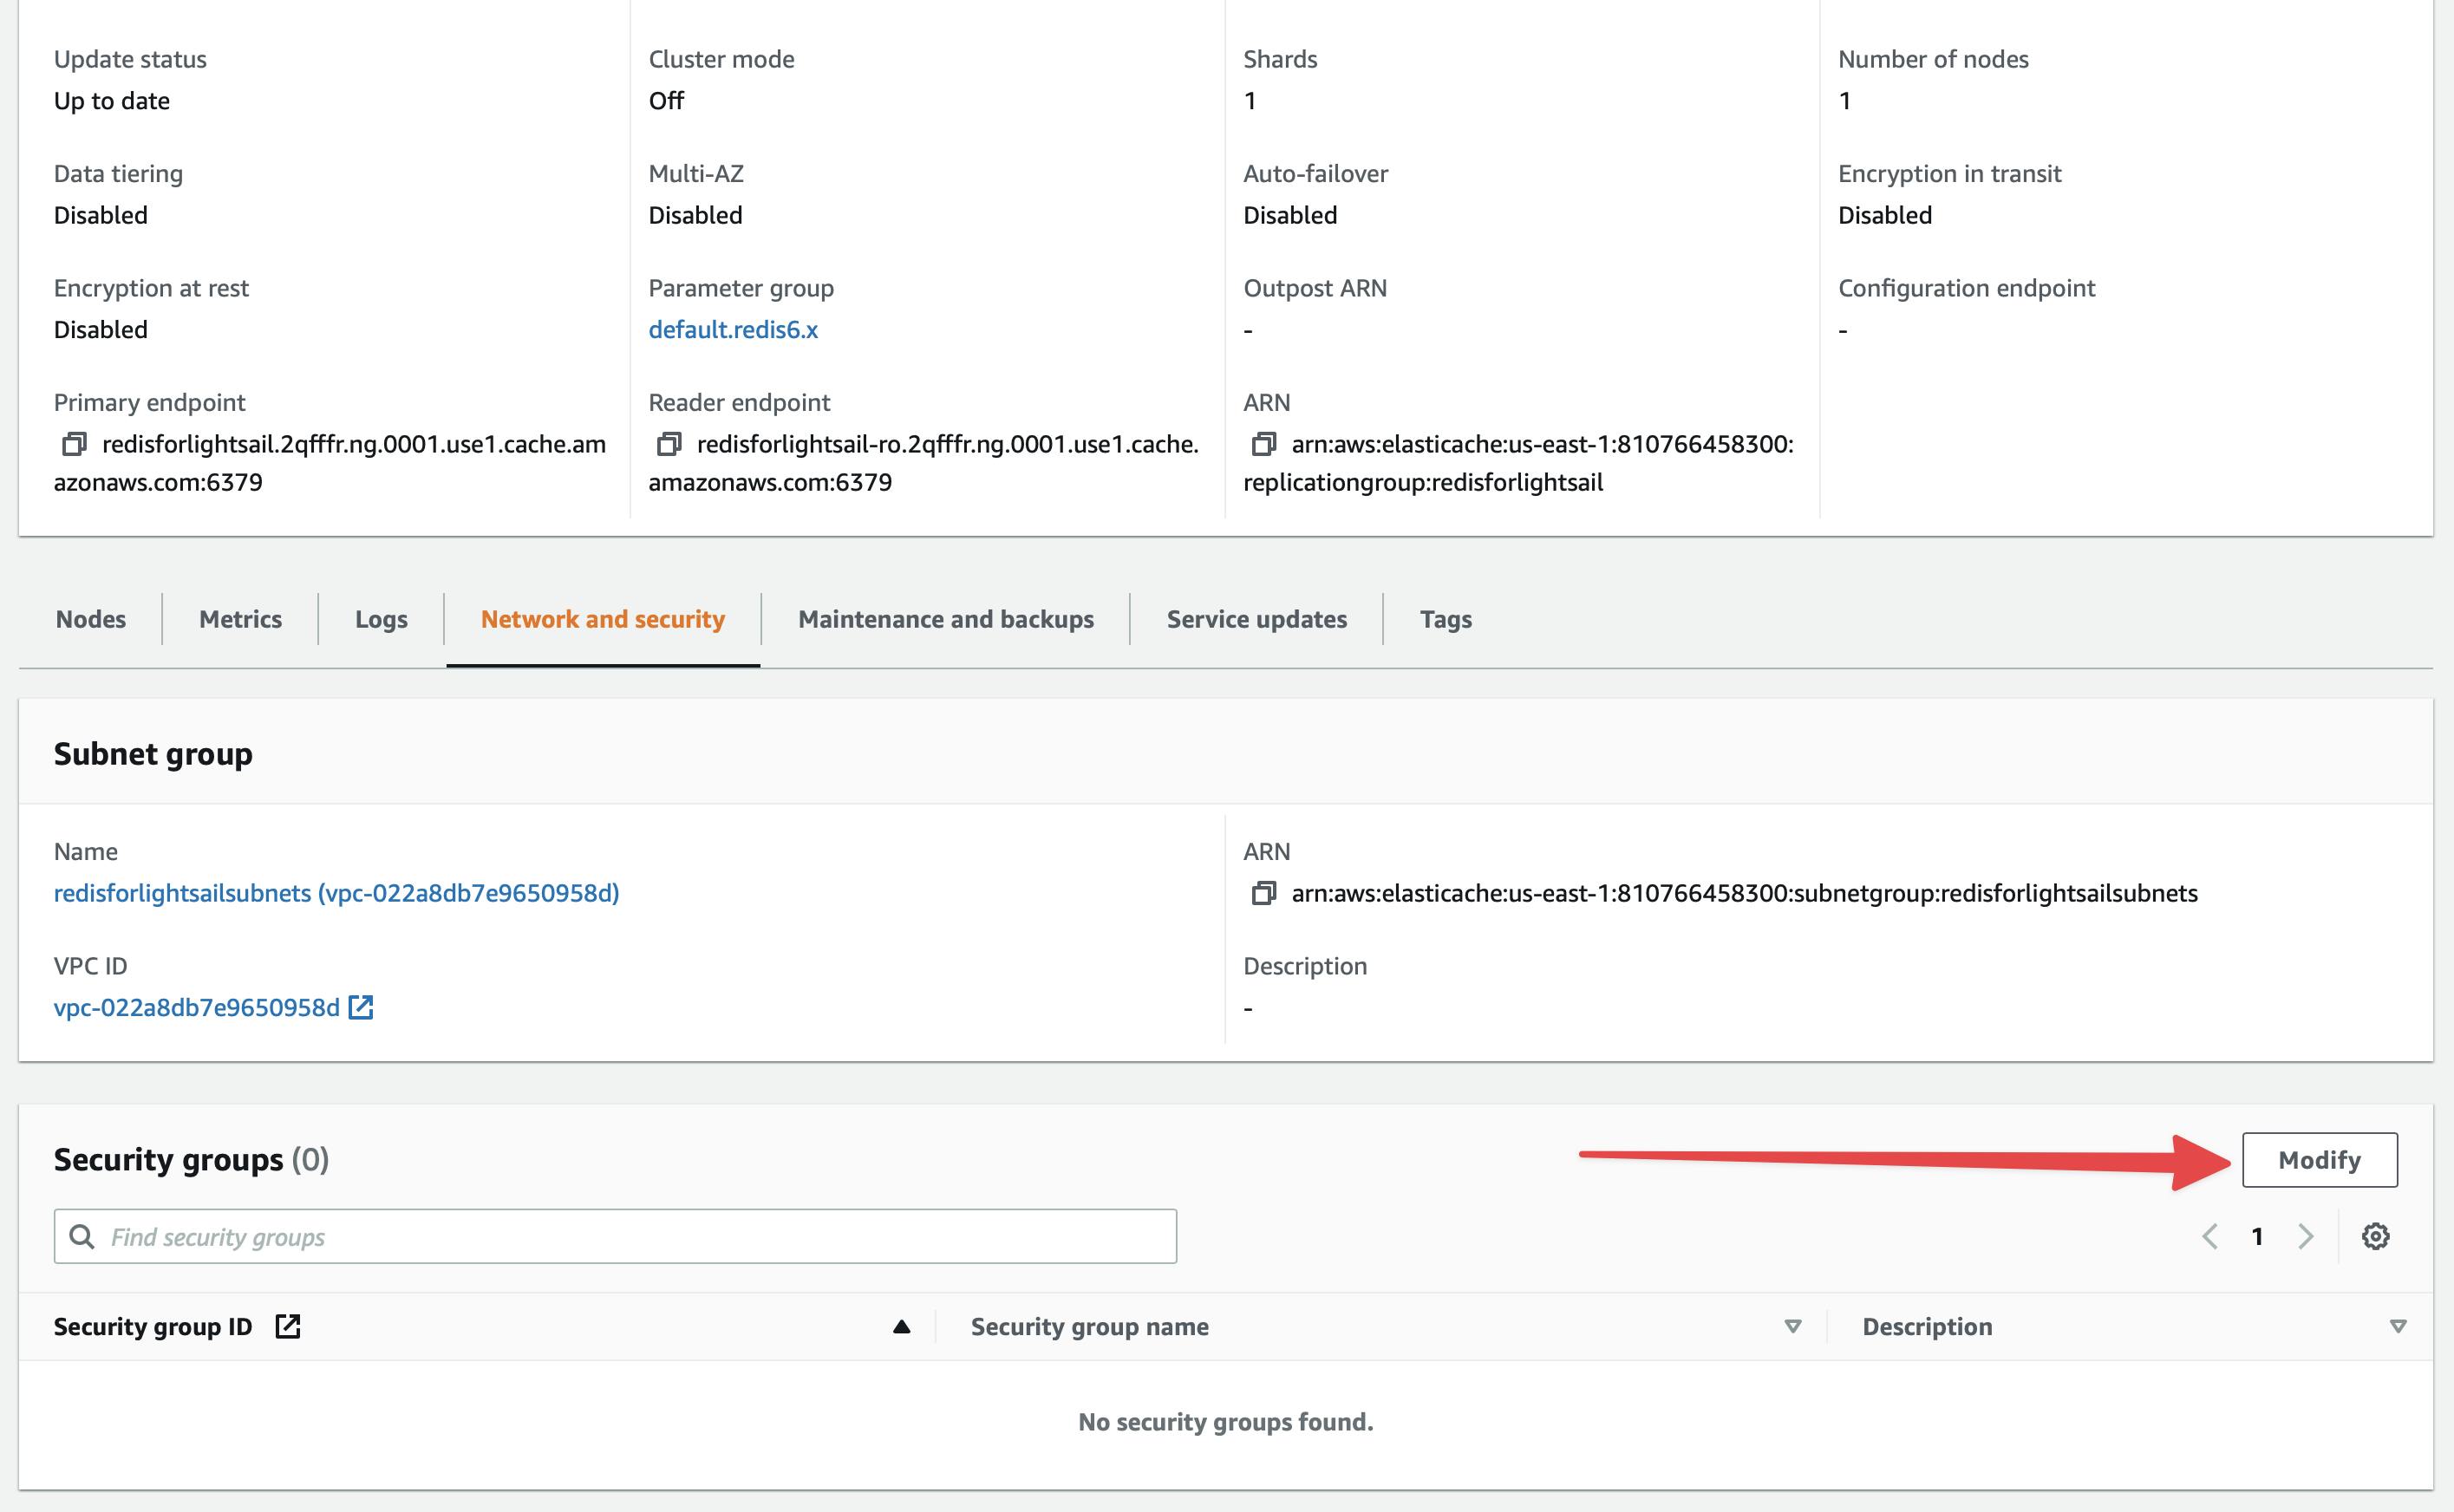
Click on the Manage button from the next screen
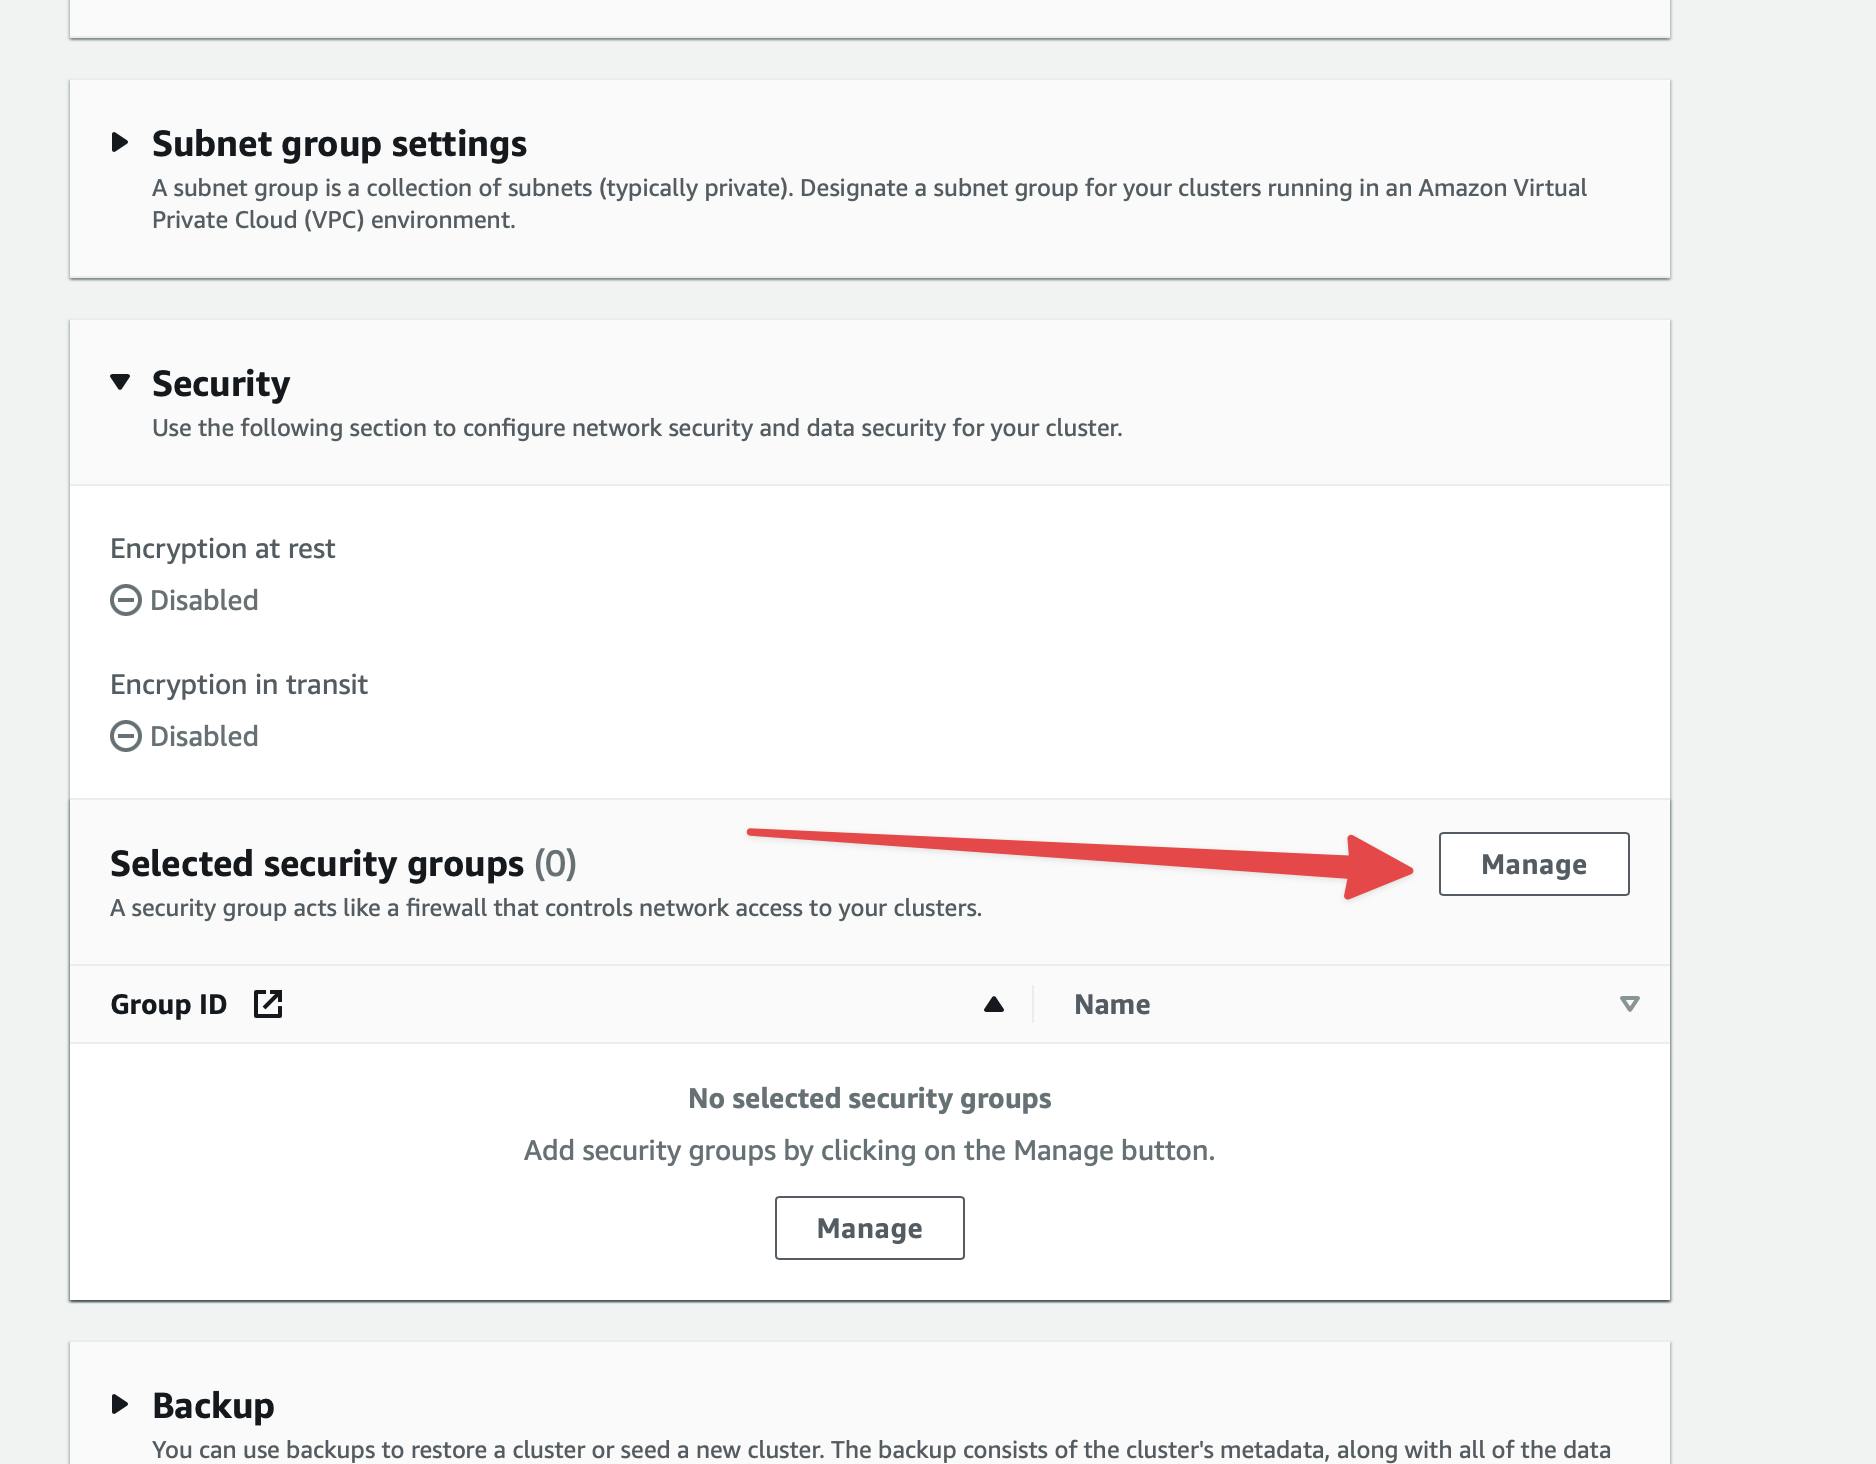
Select the correct security group from the pop and then click on the Choose button.
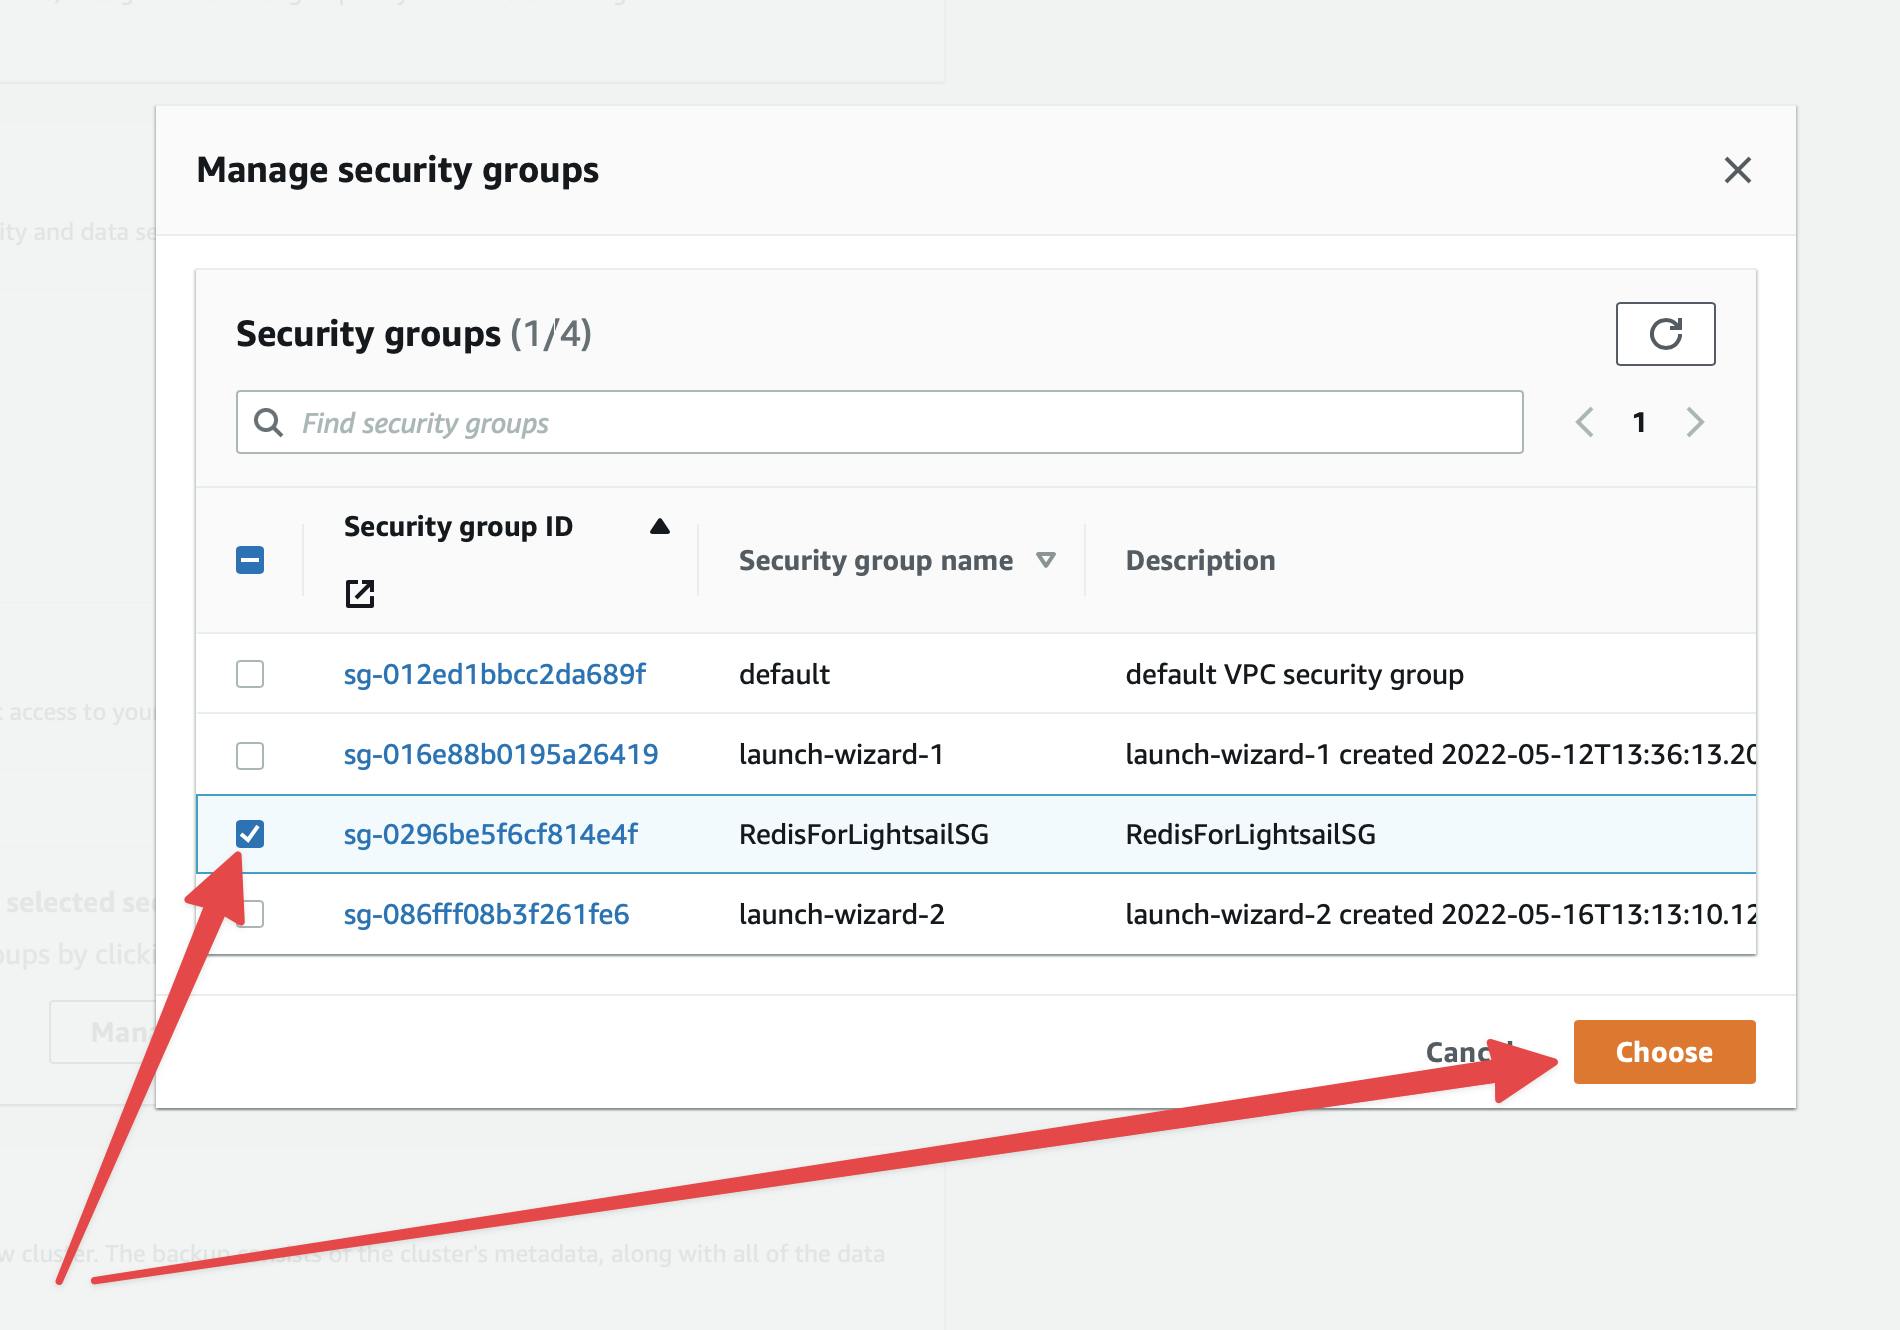
Click Modify button from the bottom of the page.
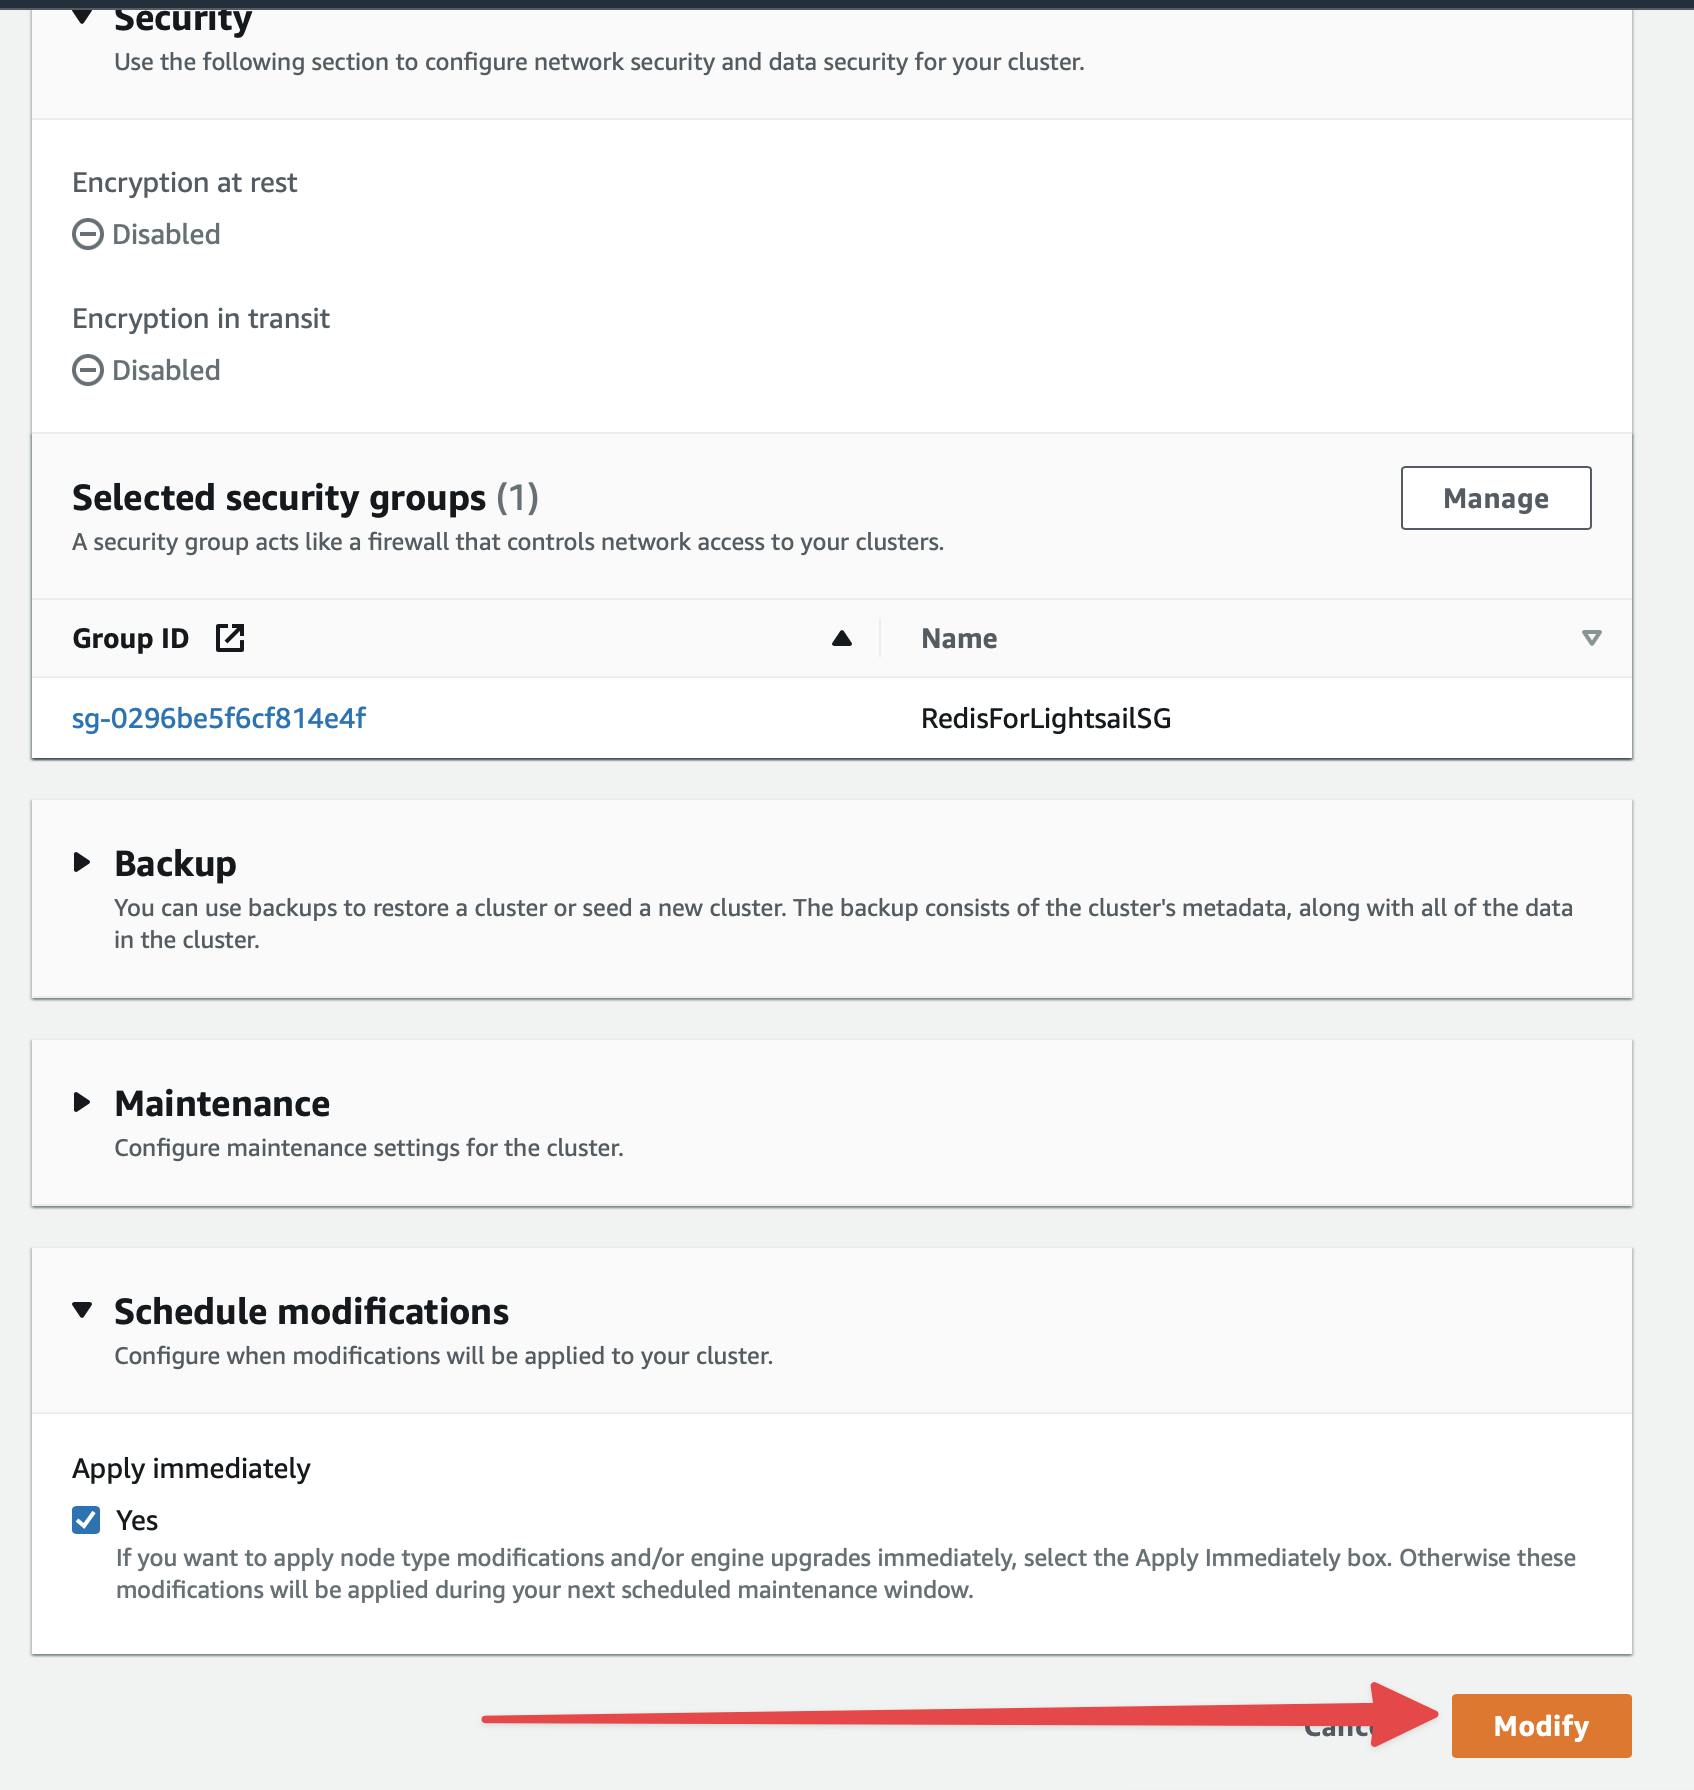 It will take a few minutes to complete the modification. Wait until the status changes to Available.
VPC Peering
The important part of this tutorial. We need to peer VPC between Lightsail and Redis cluster's VPC to connect it.
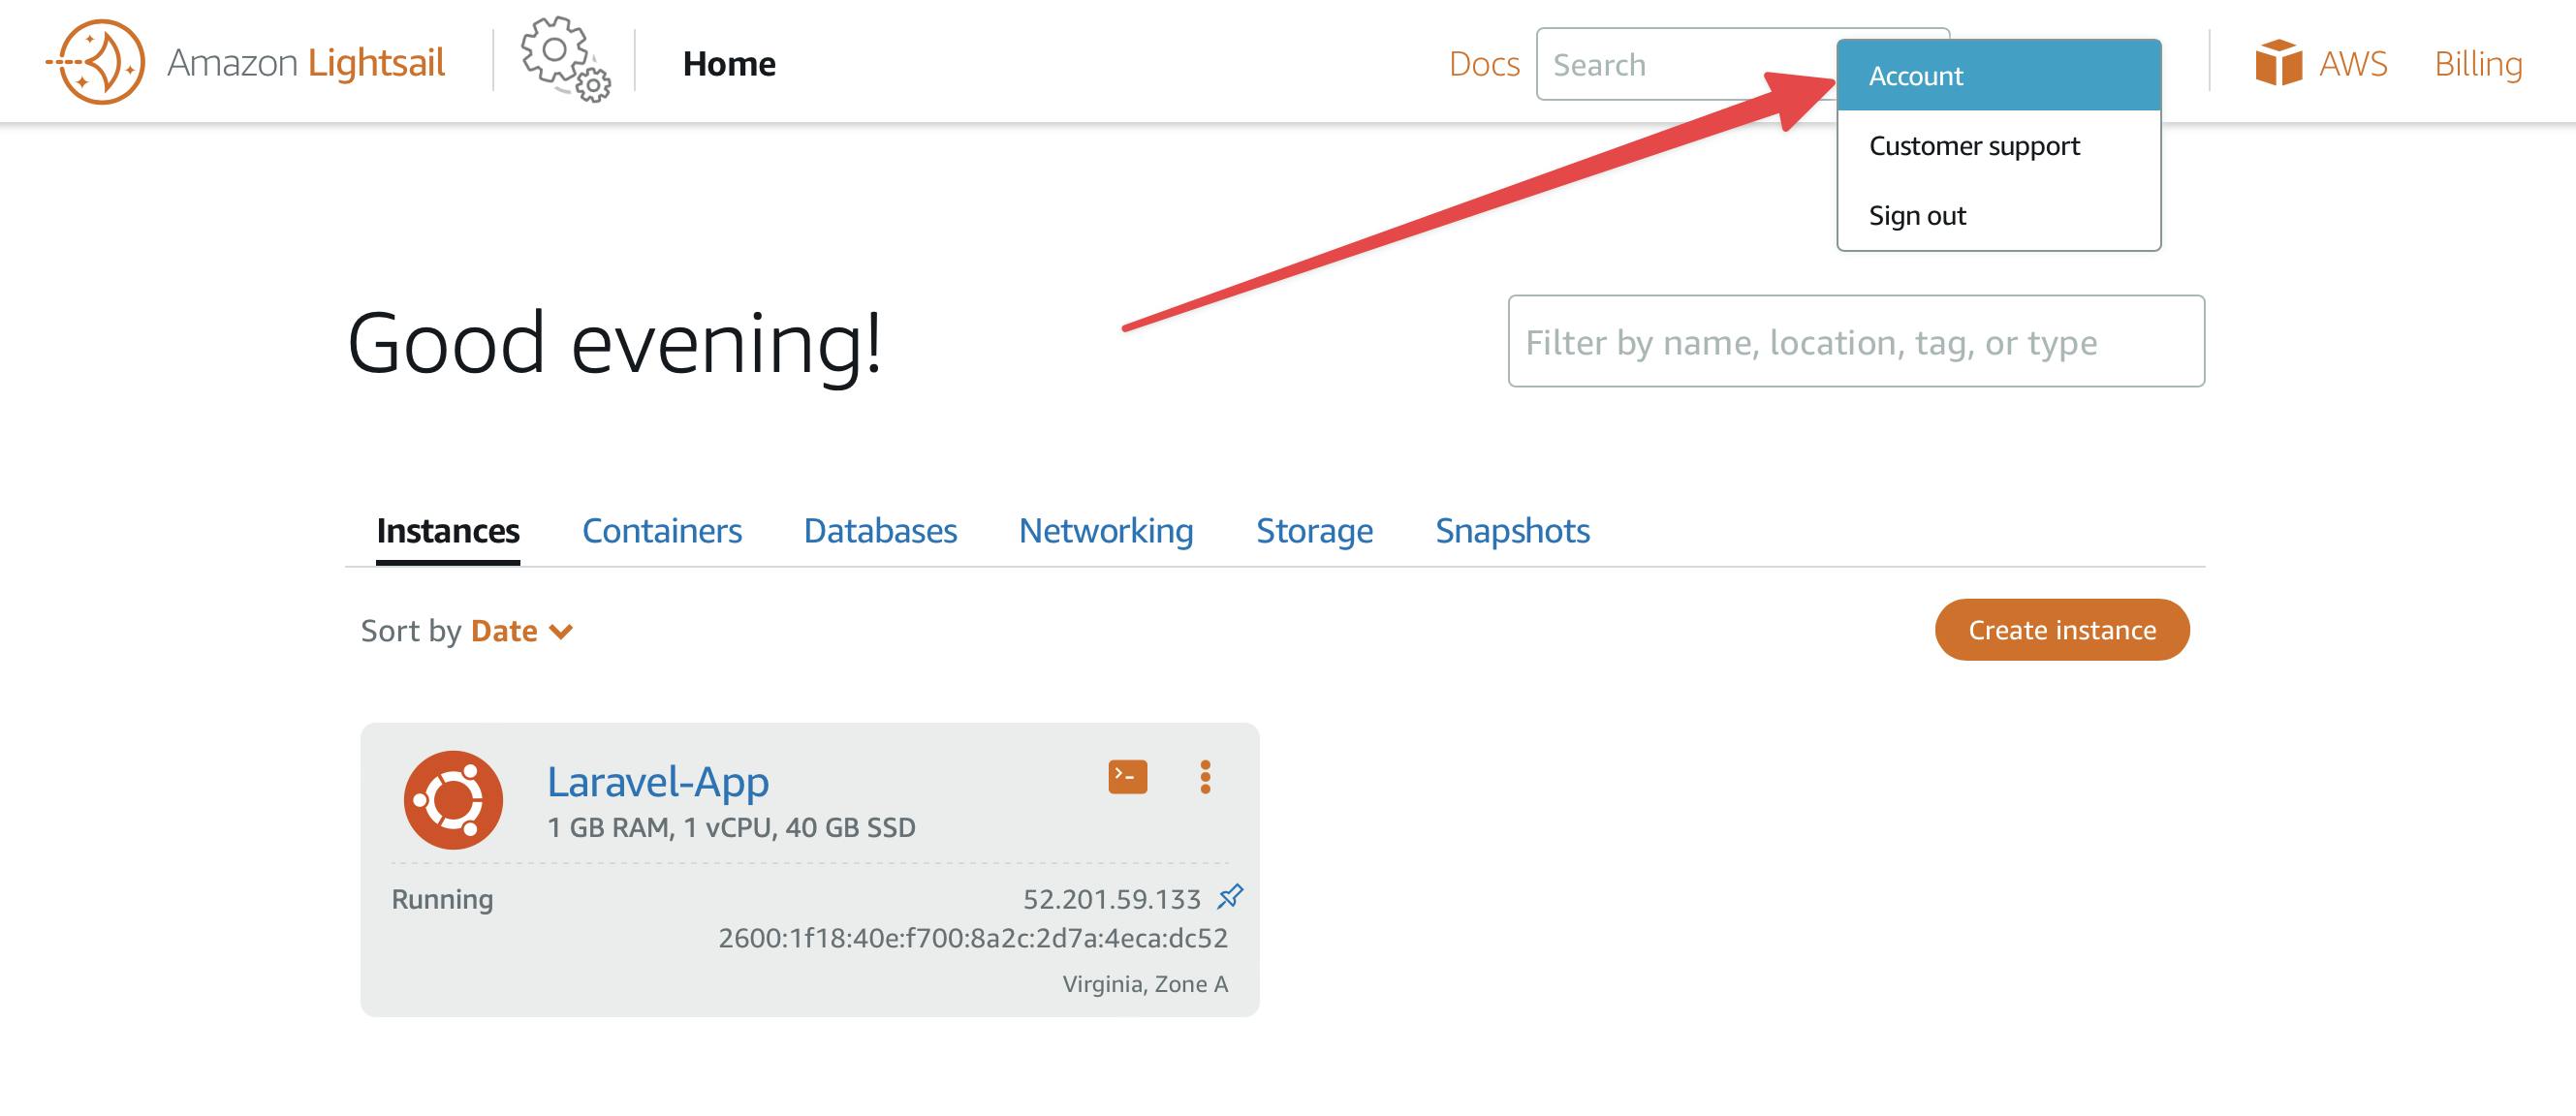
Go to the homepage of the Amazon Lightsail console. Click the Account from the Account menu dropdown.
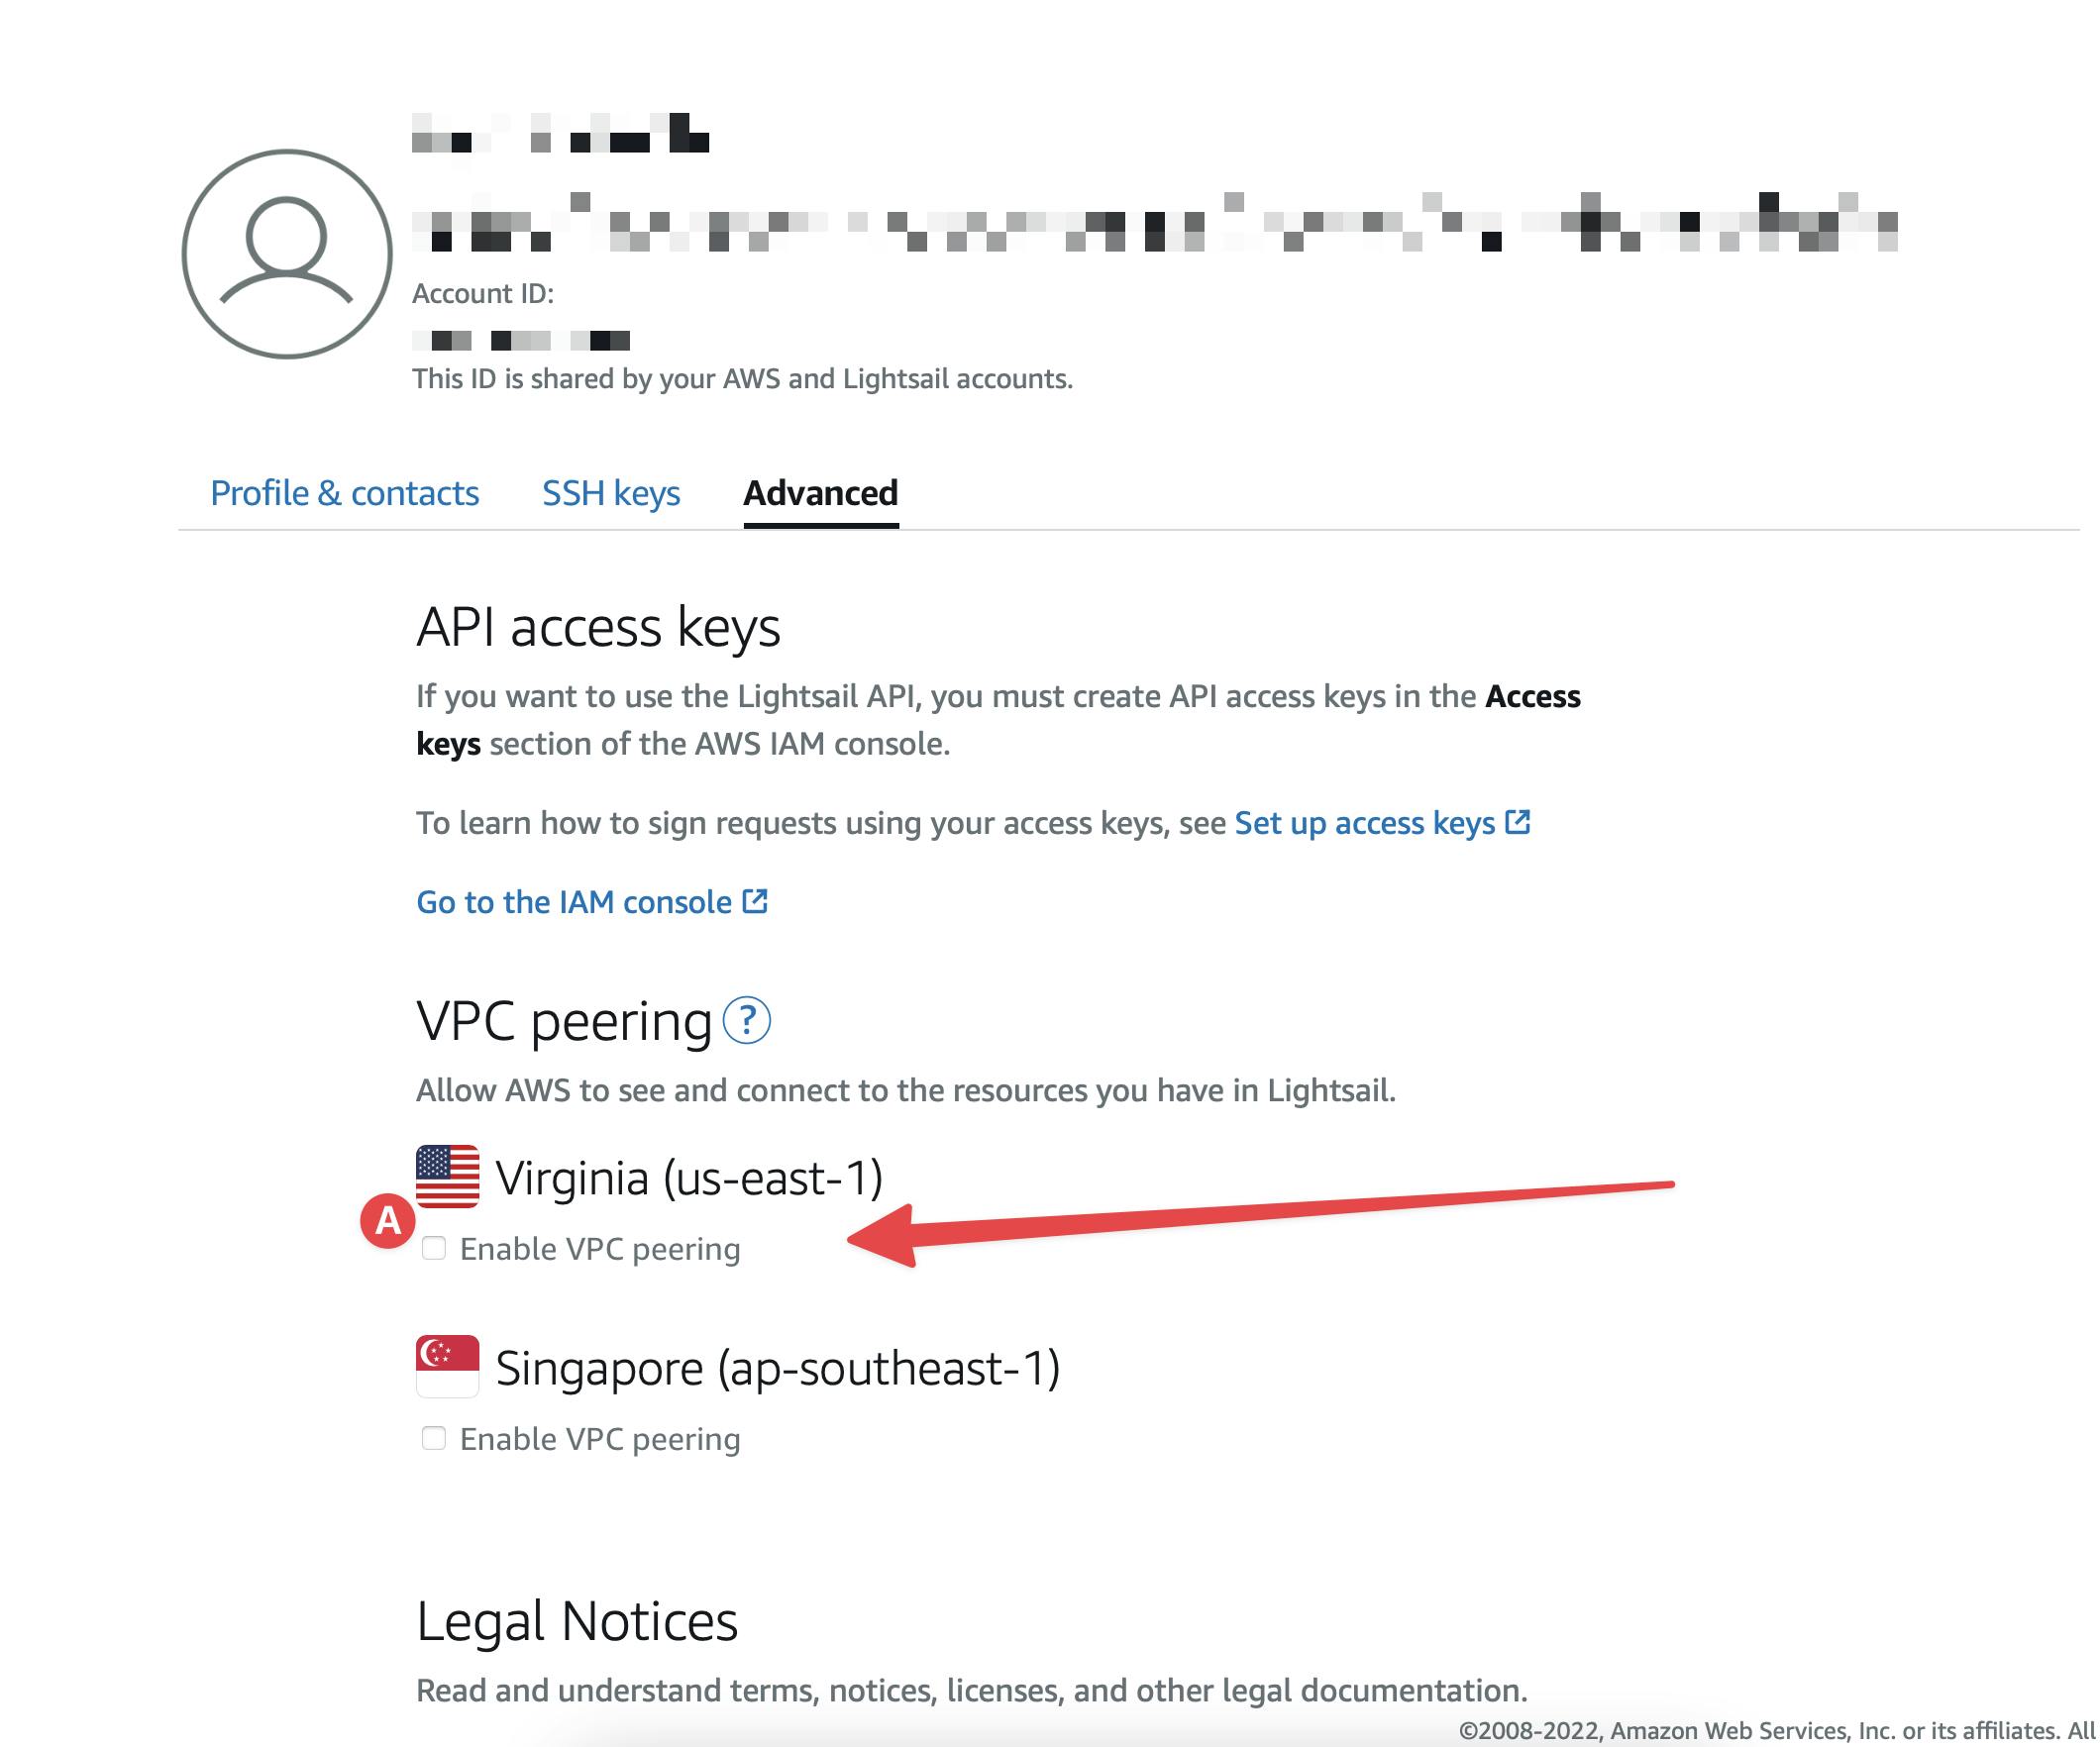
Click on the Advanced tab from the Account settings page. You will see a list of your VPCs. Connect the one that resides in your Redis cluster. For me, it's Virginia (us-east-1) .
Connect to the Redis cluster from the Lightsail instance
Using CLI
Connect to the instance using SSH. Follow this to connect to SSH.
Install Redis CLI
- A. On Amazon Linux 2
sudo amazon-linux-extras install epel -y sudo yum install gcc jemalloc-devel openssl-devel tcl tcl-devel -y sudo wget http://download.redis.io/redis-stable.tar.gz sudo tar xvzf redis-stable.tar.gz cd redis-stable sudo make BUILD_TLS=yes - B. on Ubuntu
sudo apt install redis-server
- A. On Amazon Linux 2
Now connect to the Redis cluster. The moment of truth.
redis-cli -h <redis_endpoint> -c -p 6379Replace
<redis_endpoint>with your Primary endpoint of Redis you copied in the clipboard. Remove port (":6379") from the endpoint URL. You will see this screen if successful 👇 You can use the
 ping,set, andgetcommands to test it out.
Connect to Application
You will get packages for most of the Applications, languages, and Frameworks. Check docs. For Laravel, you just have to configure it in the .env file.
Conclusion
Hope you enjoyed this short article. You can subscribe to my newsletter, and follow me on Twitter, Dev.to, and Hashnode.

