

Add (Cloudfront) CDN Distribution to WordPress Application hosted on Amazon Lightsail
Beginner-friendly guide to adding CDN distribution to WP app


It's not very hard to add CDN Distribution to a WordPress app hosted on Amazon Lightsail. But if you are new, it can be cumbersome. This article is to demonstrate how to do it easily.
Why Should I use CDN distribution?
You might hear about Content Delivery Network (CDN). If not, here is an article explaining "what is CDN?".
If you are not interested to read a long article, here is TL;DR: In CDN, Lots of small servers run closer to your customer. Content gets cached there and served from the closer server(s) of your customer. In that way, ease the pressure from the main servers.
What is CDN Distribution?
It is the Amazon Lightsail CDN service. Under the hood, it uses Amazon Cloudfront. It has 300+ points of presence to deliver content closer to your customers. On top of that, it comes with AWS Shield, which protects infrastructure from DDoS attacks.
Are you excited to create your first CDN Distribution? Let's go 🏃♂️
Prerequisites
WordPress Application
You need to have an existing WordPress application for this tutorial. Don't worry if you don't have one. I covered How to Deploy WordPress Application to Amazon Lightsail in the first part of this series.
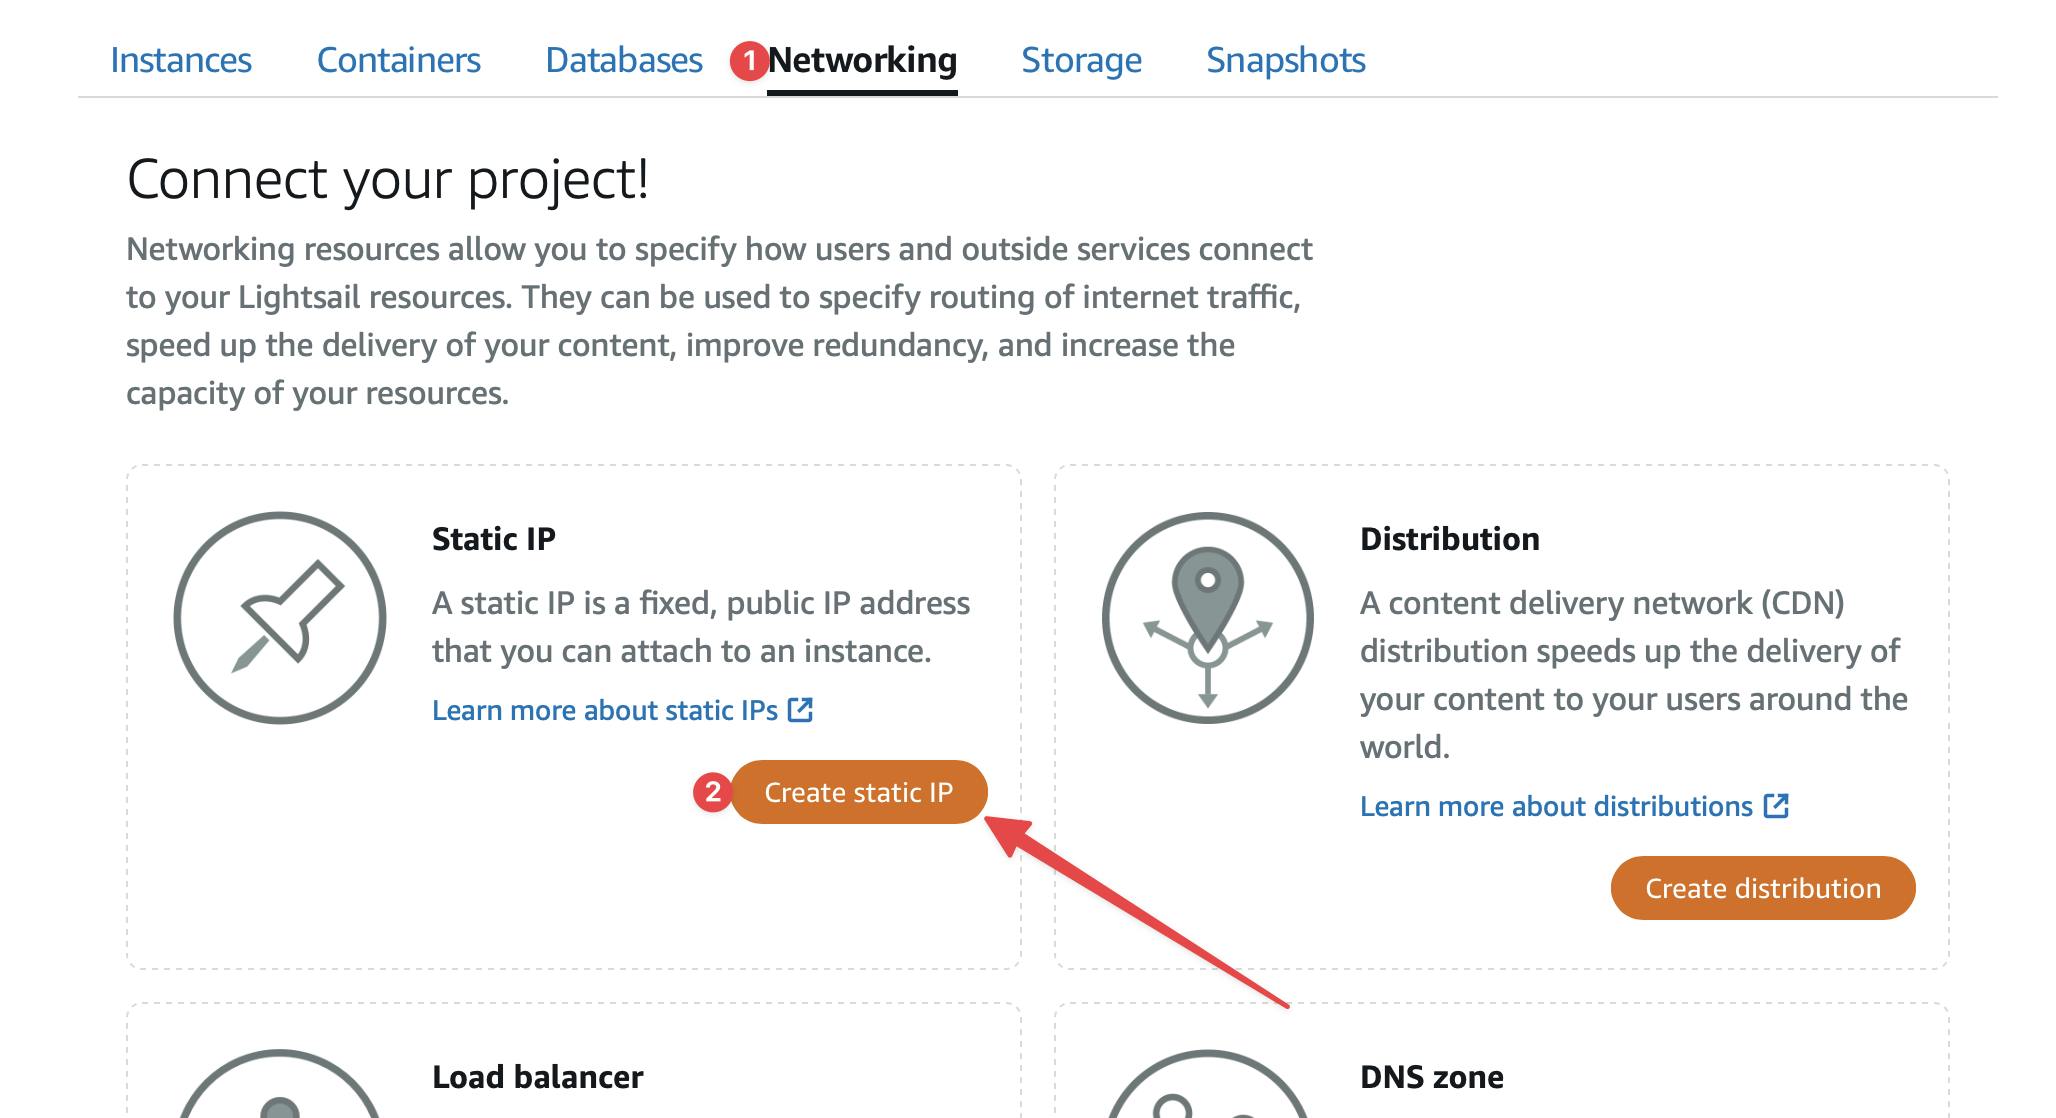
Attach a Static IP to WordPress Instance
Go to the Networking tab and then click on Create static IP
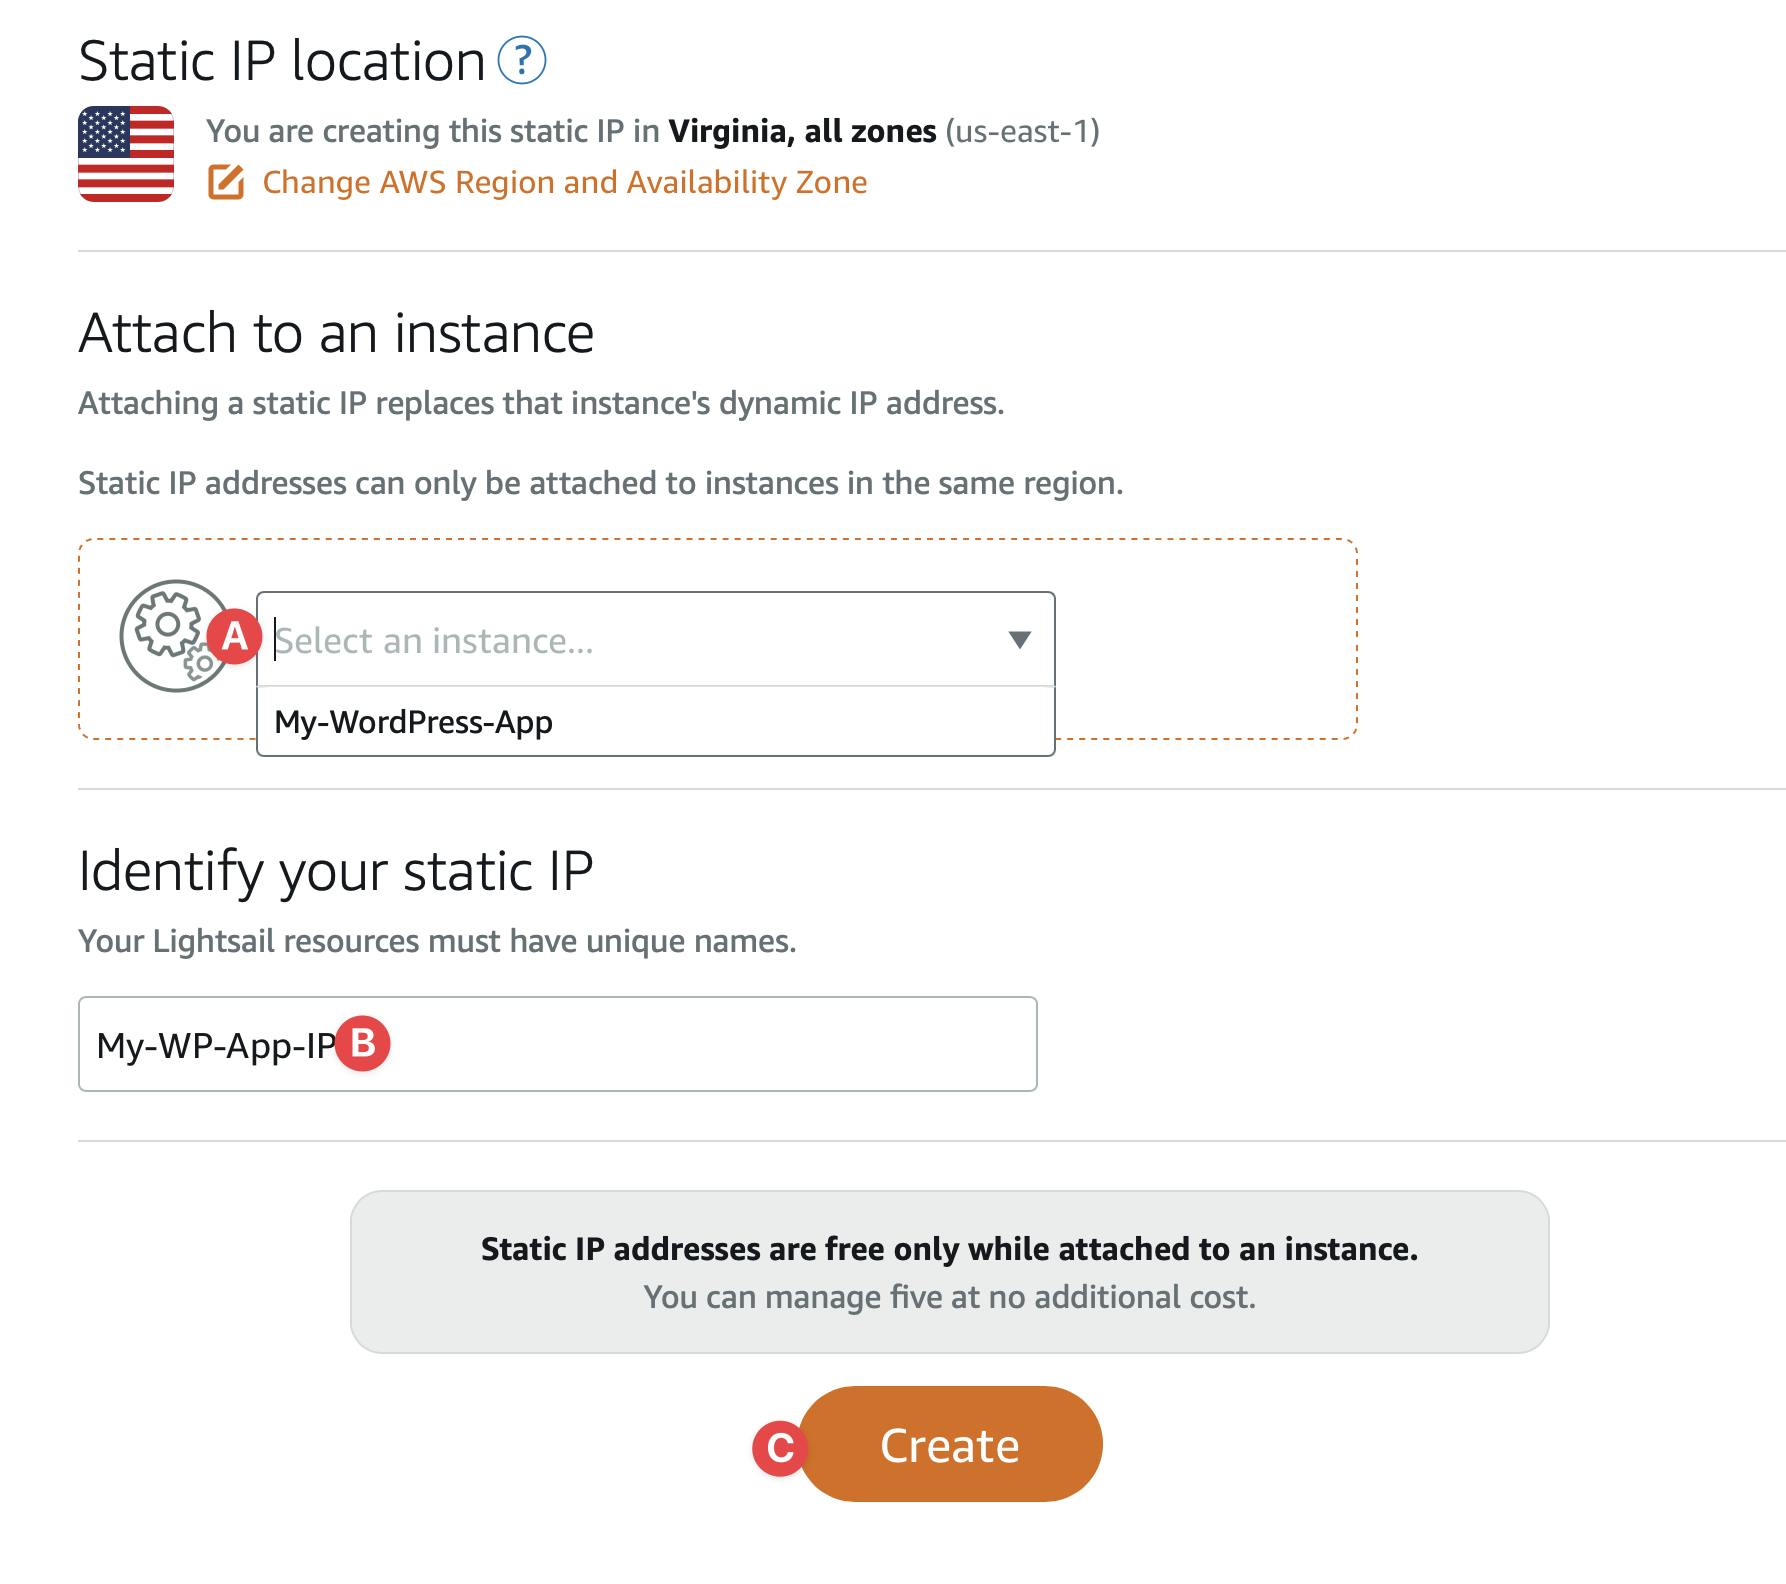
(A) Select the WP App instance. (B) Give it a meaningful name and (C) Hit Create.
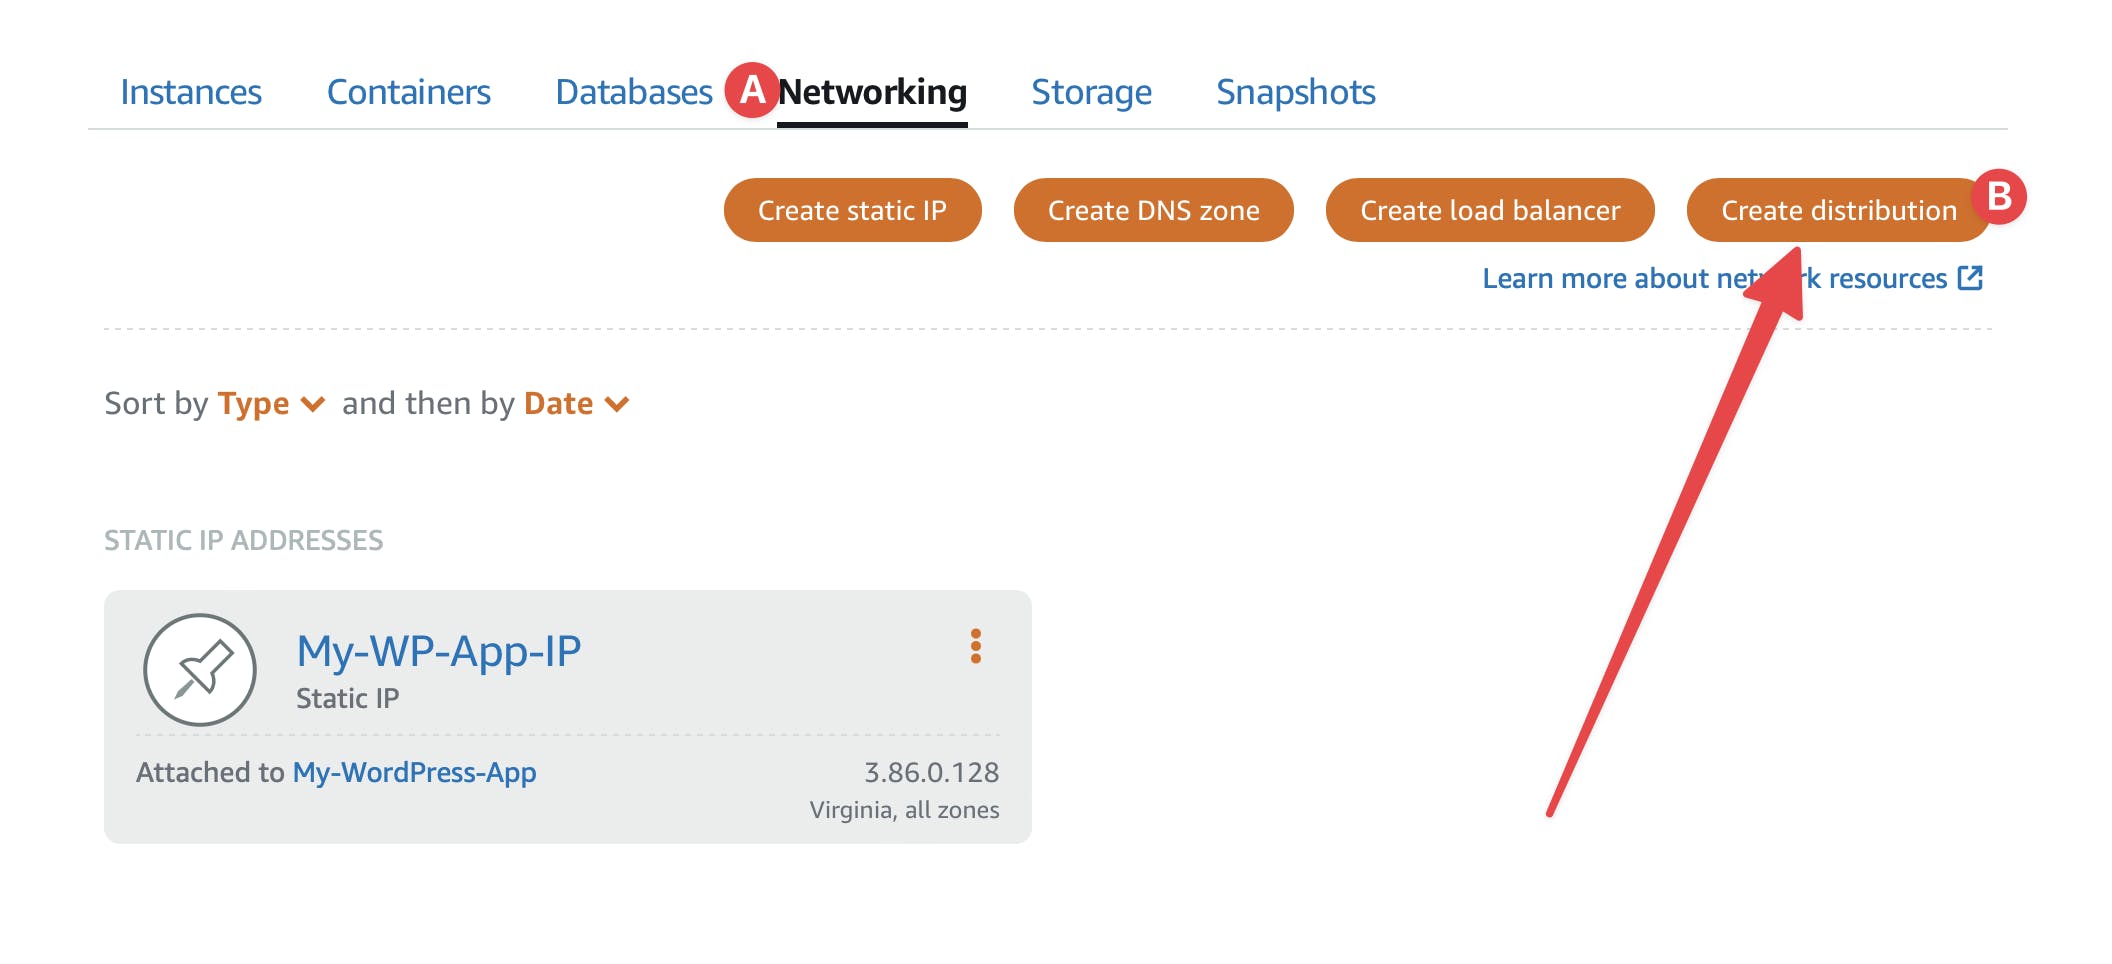
Now we are ready to create our first distributions.
Create CDN Distribution
Go to home page of Lightsail. Go to Network tab again. This time hit the Create distribution button.
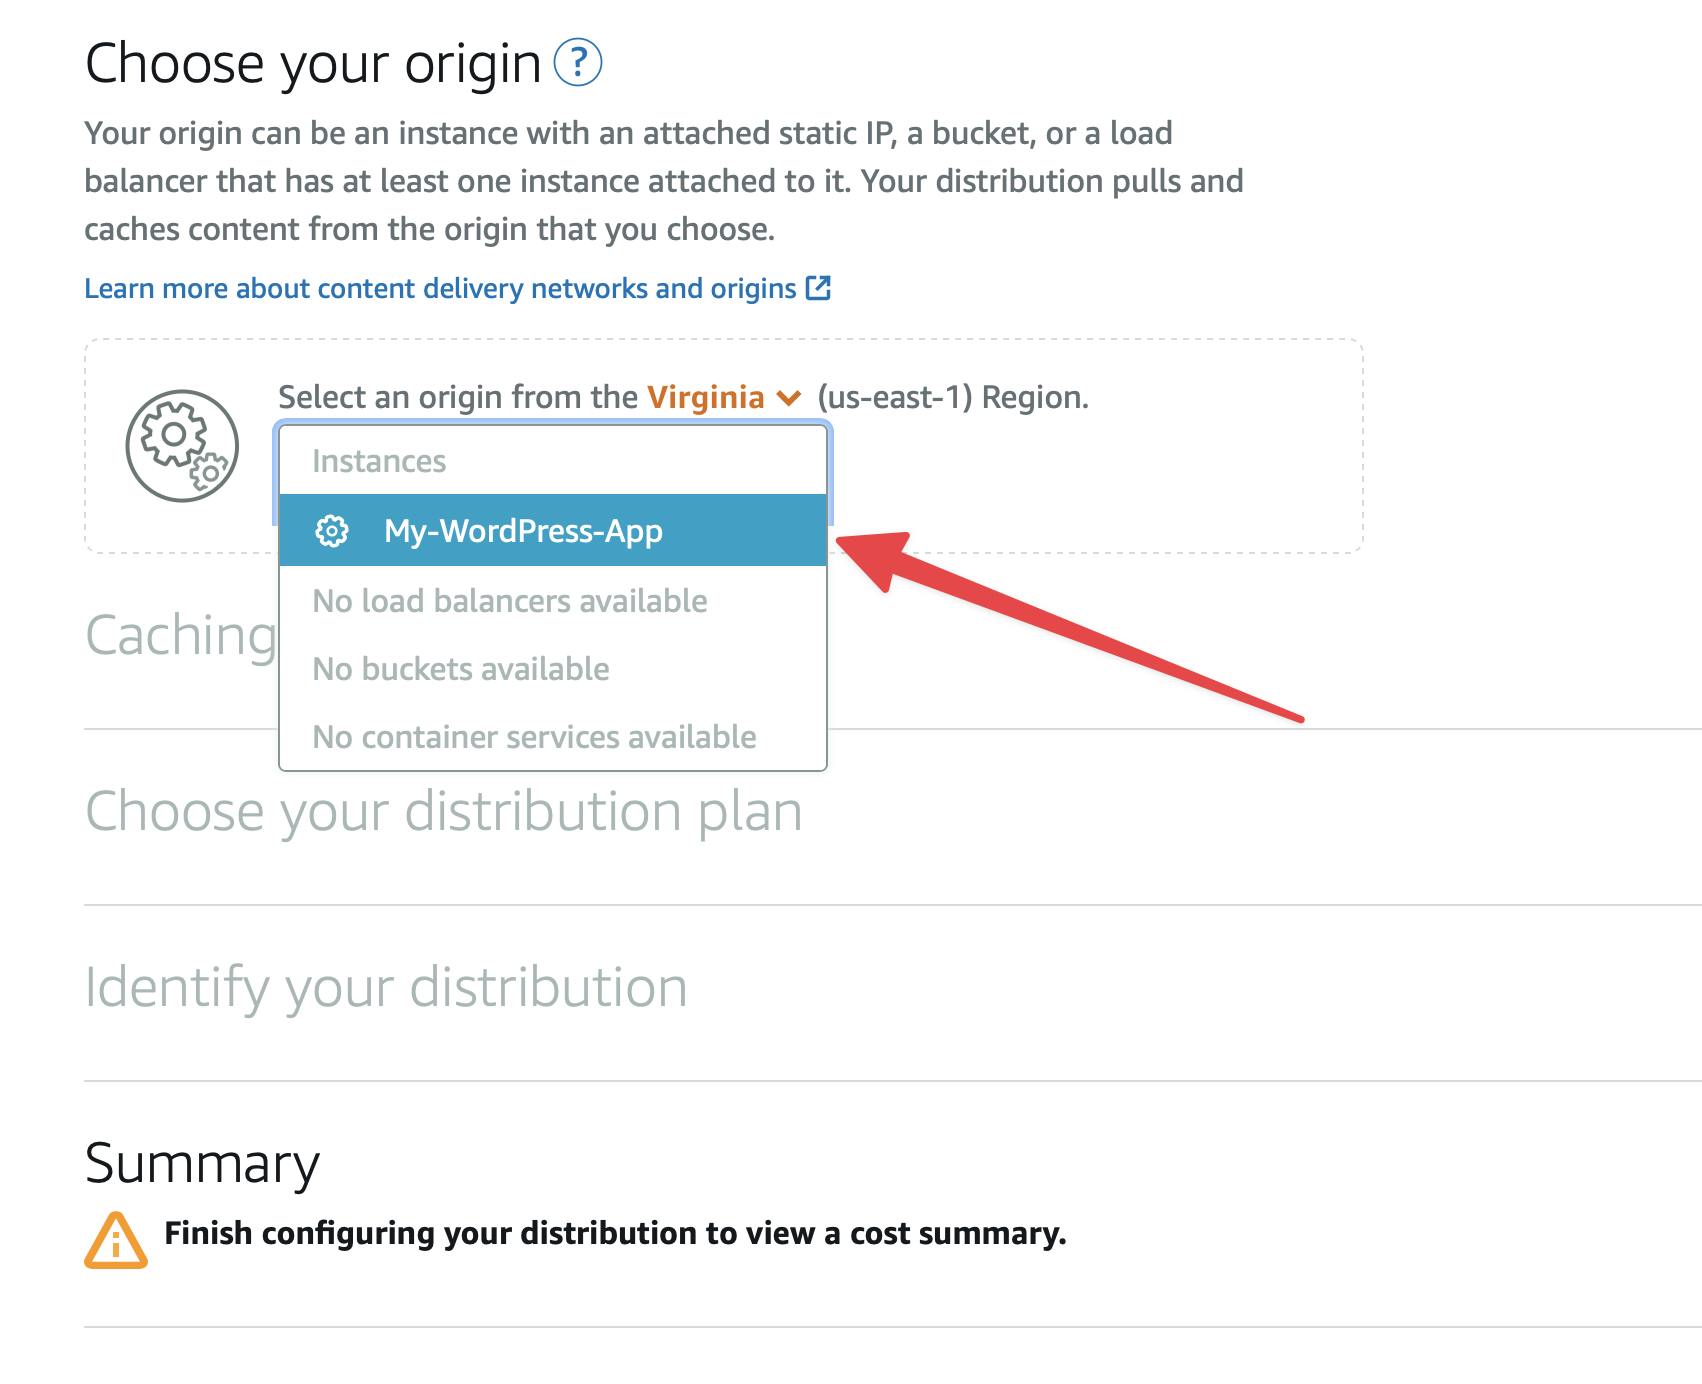
Select the WordPress Instance as Origin
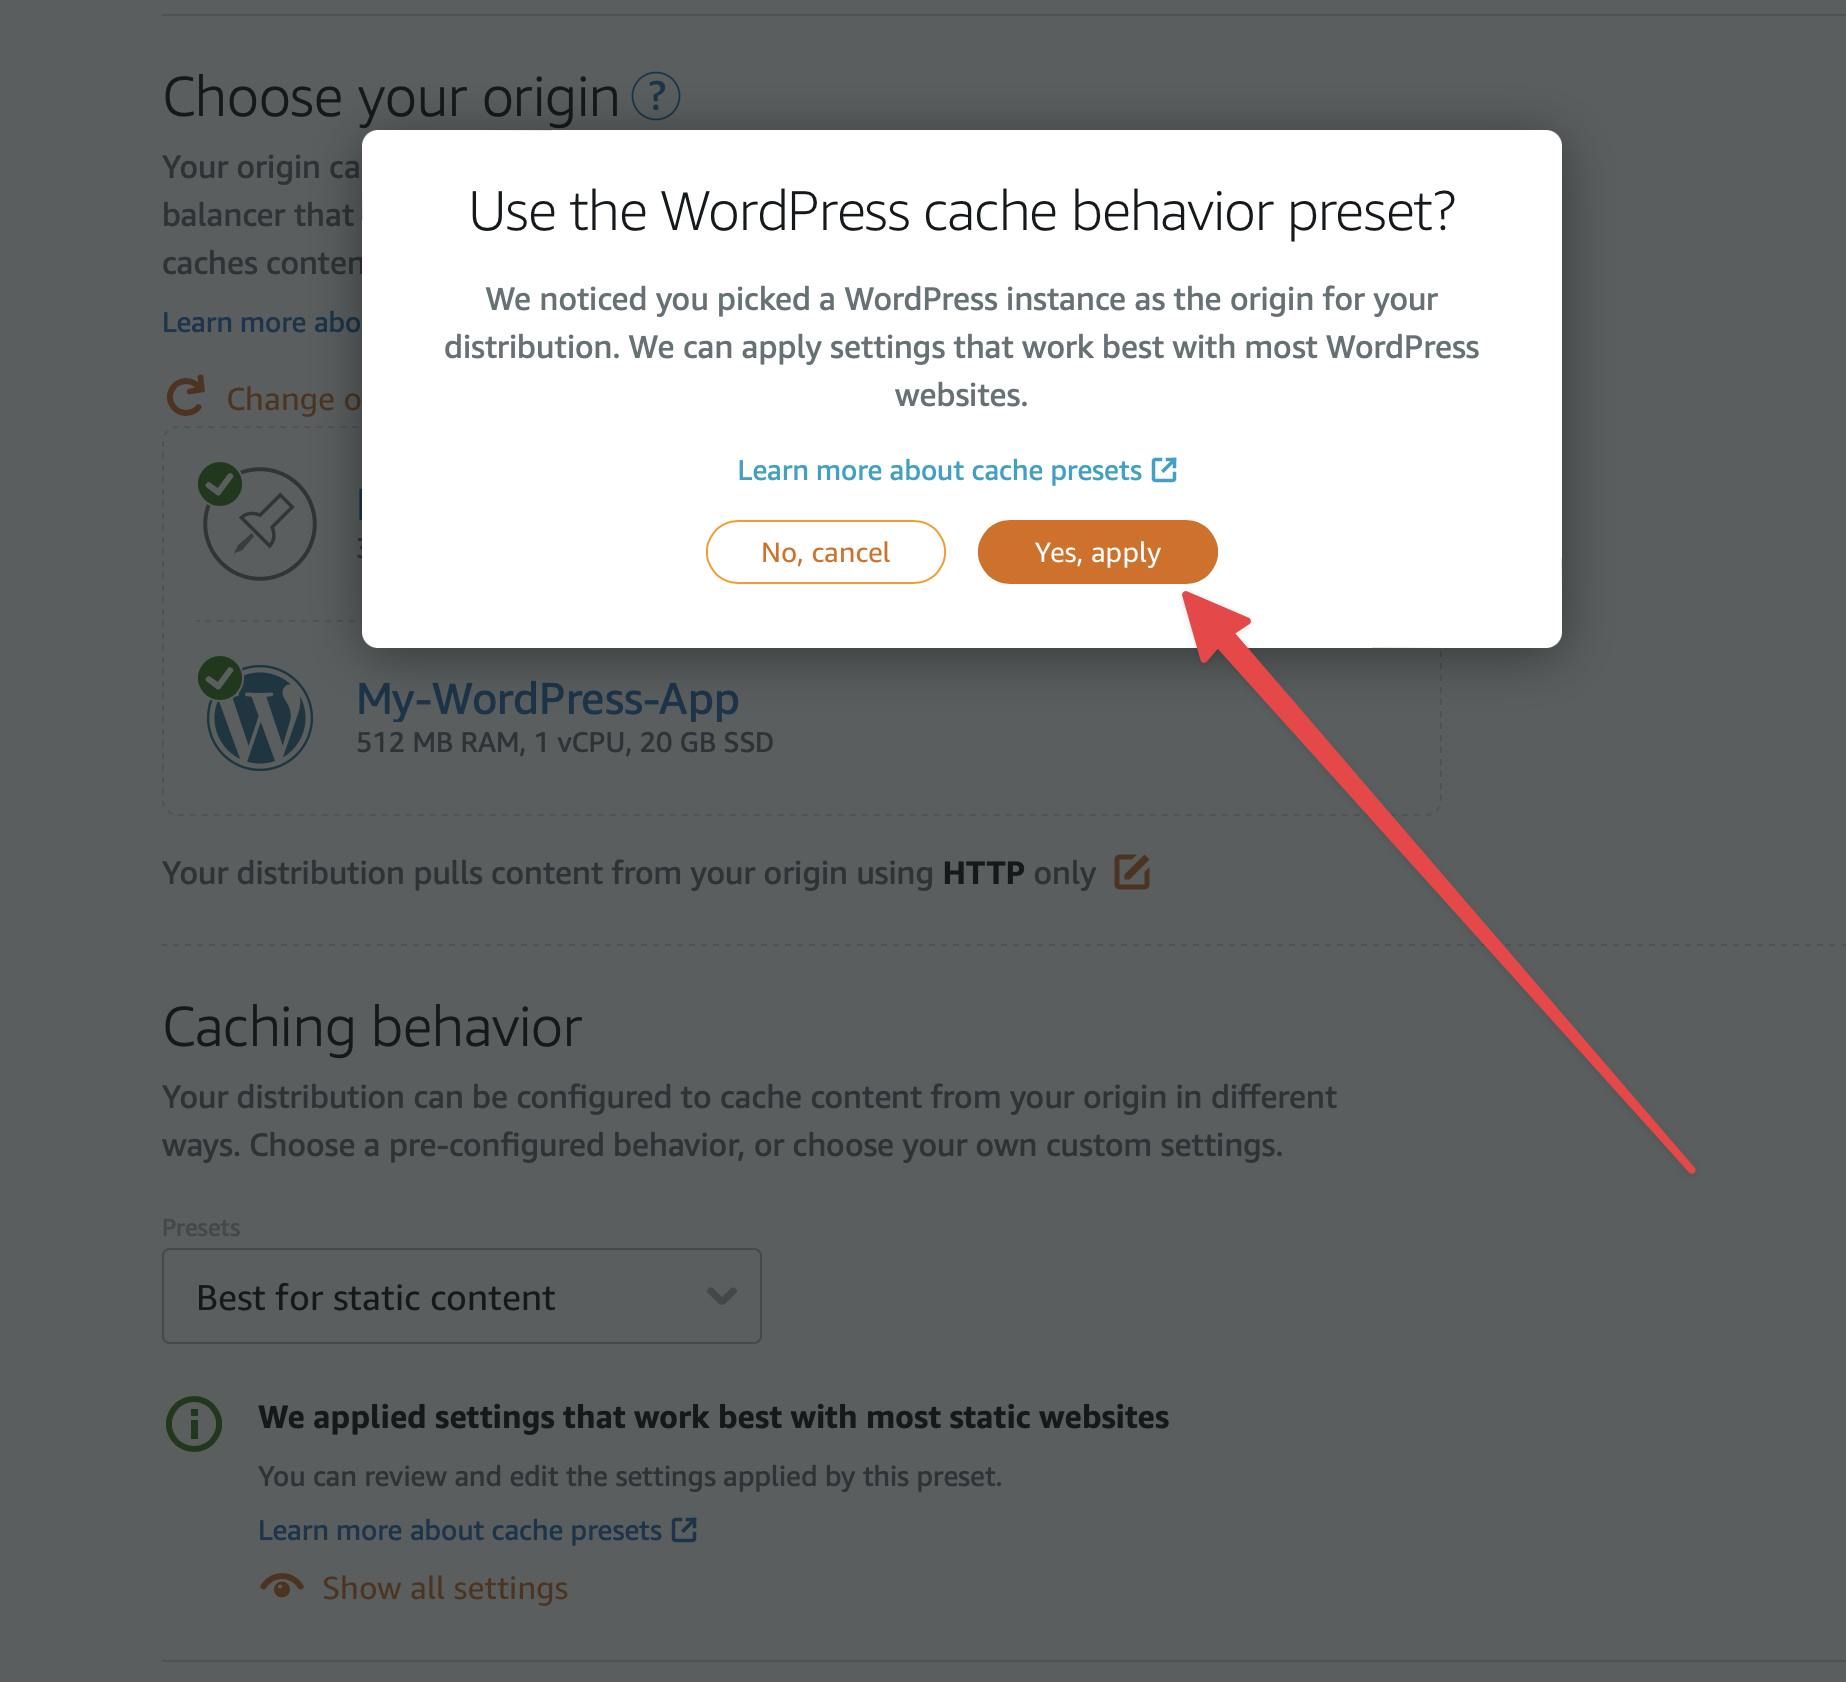
Hit Yes, apply to apply the predefined WordPress settings
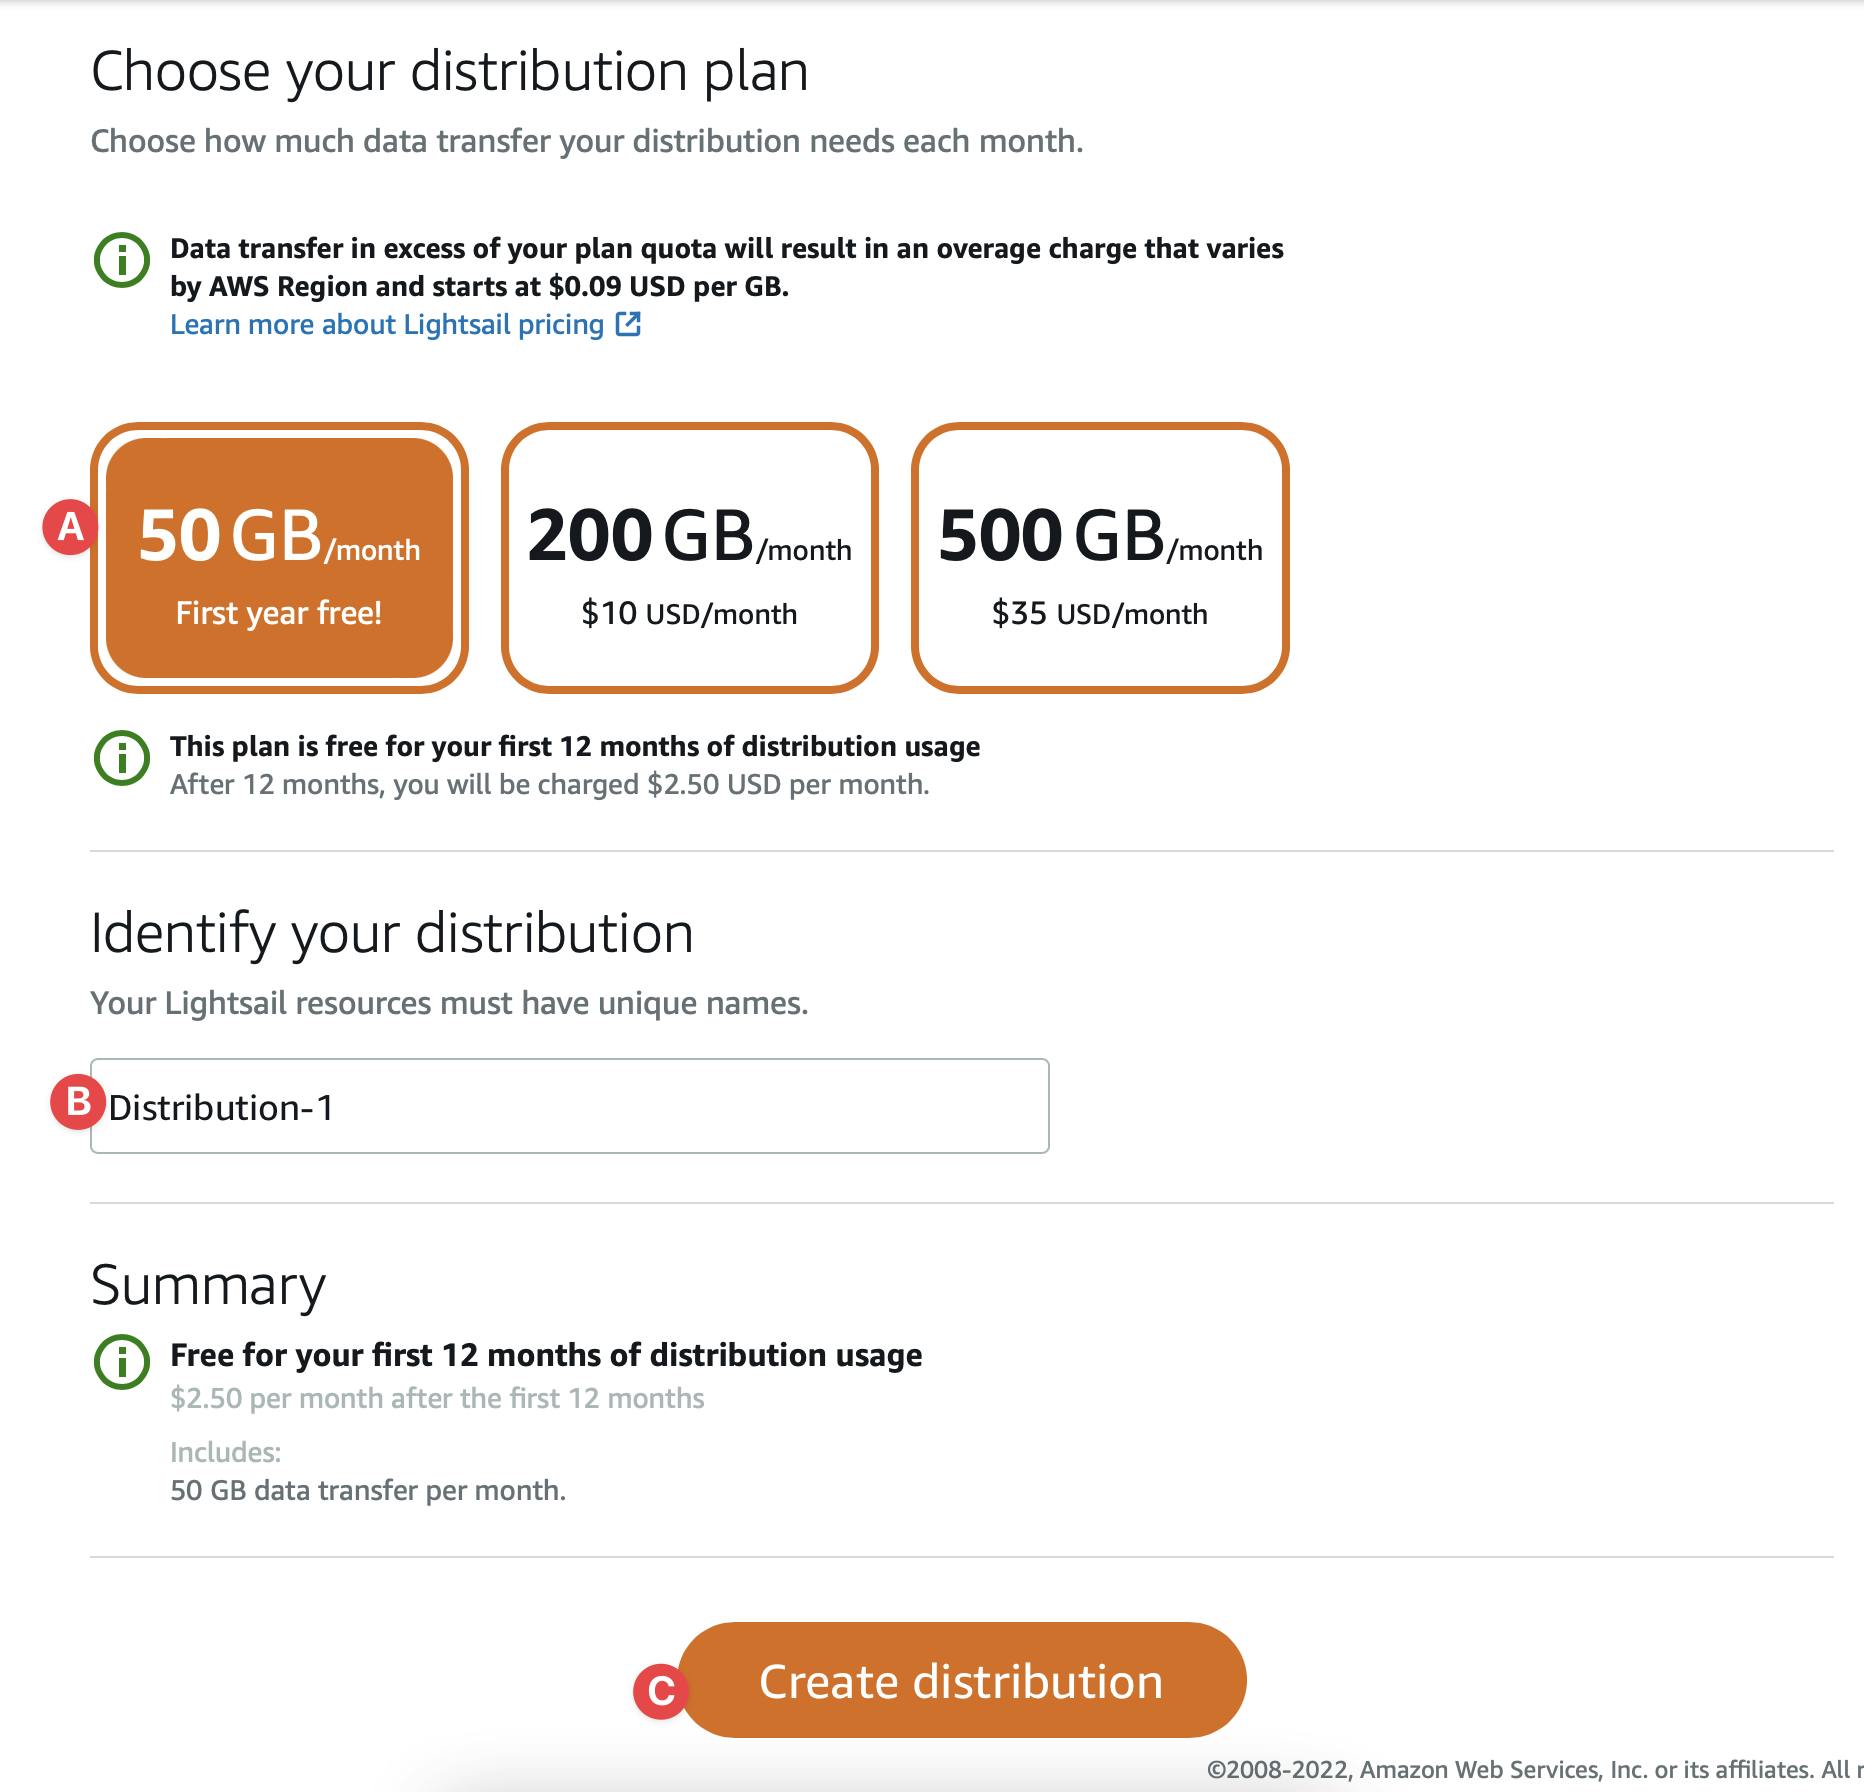
Now, (A) choose a plan. (B) Give it a name and (C) Hit Create Distribution button
Woohoo 🎉 Your first distribution is created. Wait for a while to be available. After getting done, you will see this 👇
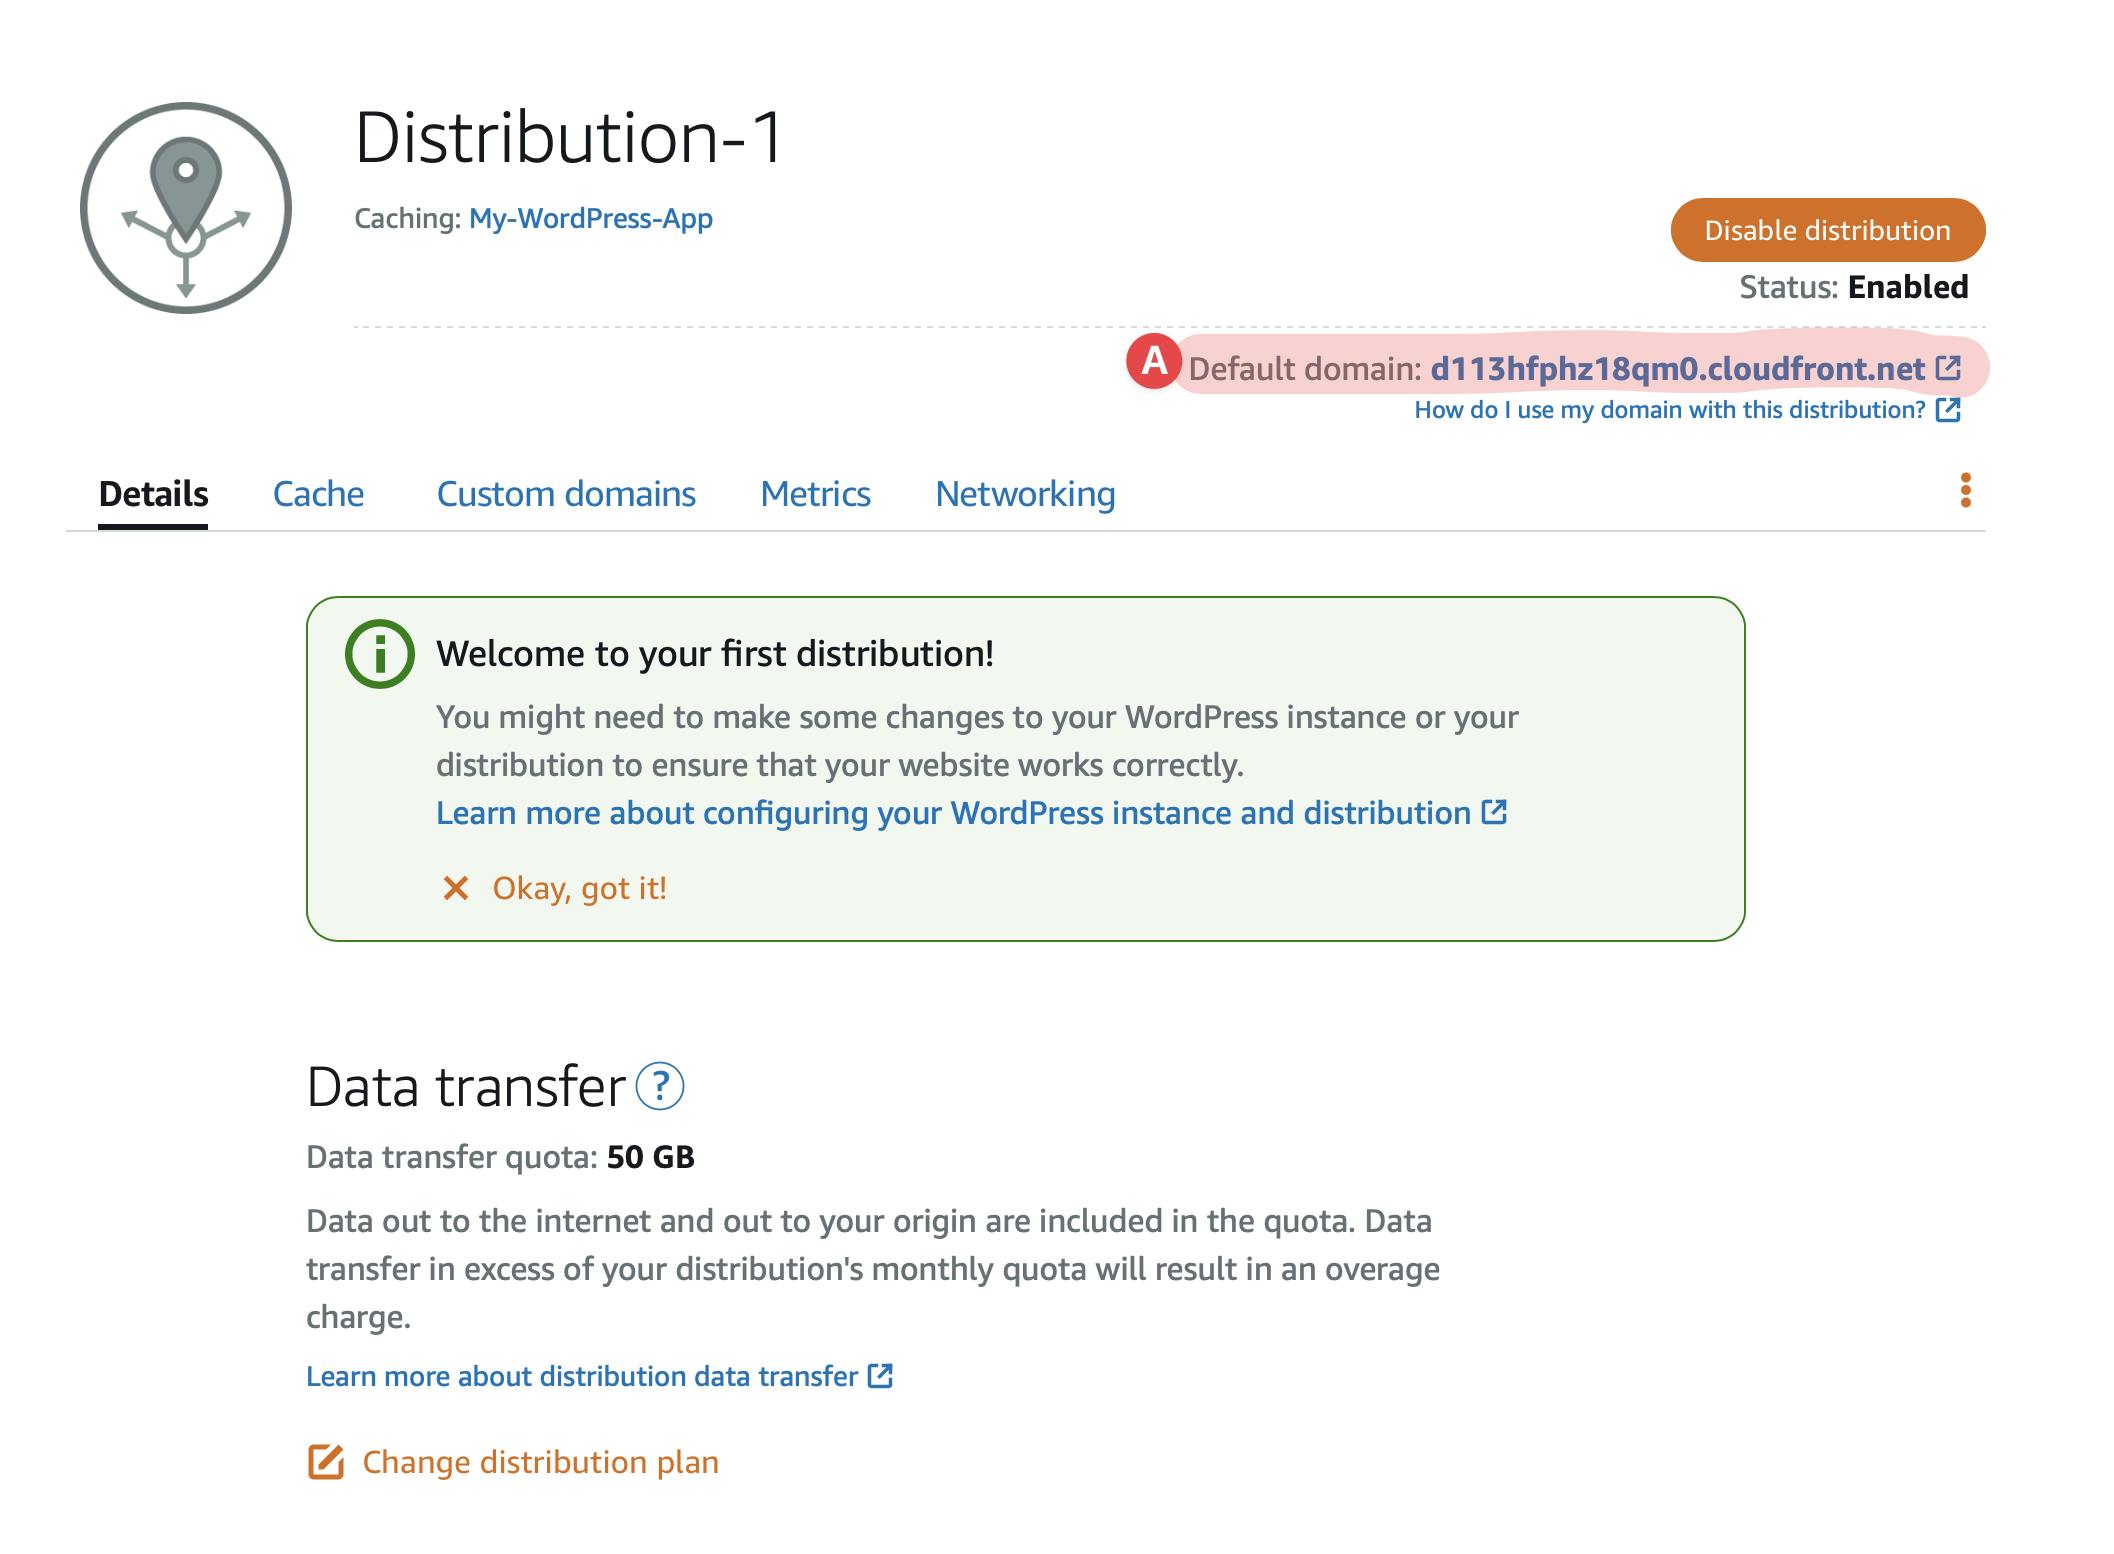 (A) Your domain for the distribution. You can access the site using this URL.
Domain
Update the Domain in DB
Login to your WordPress application's database, you may follow this. Update the siteurl and home to your wp_options table to your distribution domain.
Bonus
You can use a custom domain instead of CloudFront's sub-domain. You may follow this tutorial.
You can add Object Storage to your WordPress app with a CDN distribution by following this tutorial.
Conclusion
Hope you enjoyed this simple article and created your first CDN distribution. Ask your questions in the comment. Subscribe to get the next blog post. Thanks 🙏